OPTIMAL TIME TO VISIT
We advise against traveling to this location during winter due to possible road closures. Our preferred times of year are Spring and Fall, which tend to have lower attendance rates. We highly recommend visiting mid-week to avoid larger crowds. Plan your trip during the Milky Way season to photograph some of the darkest skies in the lower forty-eight states. Check out our Milky Way Photography page for information on when the Milky Way will be visible and optimal for photography.
HOW LONG TO PHOTOGRAPH
You can set aside two to three full days to have the opportunity to explore every nook and cranny of this expansive park and its surrounding areas. From the sprawling forests to the winding paths that led to hidden beauty, there was much to discover in this nature haven.
WHAT PHOTOGRAPHY GEAR TO BRING
We suggest you bring a robust and versatile camera setup to fully capture the park’s diverse landscapes and wildlife. Essential items include a DSLR or mirrorless camera, wide-angle and telephoto lenses, a sturdy tripod for long exposures, and multiple memory cards.
A wide-angle lens is essential for snapping sweeping vistas of the park’s forests and coastline and is our primary tool in this park. In contrast, a telephoto lens will enable you to capture close-ups of wildlife, but that is a rare occasion. If you go on a boat tour, you are more likely to see wildlife, and your zoom lens is a must. We’ve seen a visitor here and there fascinated by the sight of deer grazing in the early dawn or the flight of eagles soaring majestically overhead, but not very often.
So, the most important things are your tripod, ND filters for long exposure milky water effects, and all of your gear for Milky Way photography, including a red headlamp, flashlight, two-second timer, and zoom lens for your boat tour.
WHAT ESLE TO BRING
Hiking boots, bug spray, hats in summer, and gloves and scarf during colder months are essential for a comfortable experience. Remember, this is Maine. It gets pretty cold at night. A good quality backpack that can handle your gear and personal necessities will help in your long treks.
Remember to bring water and some high-energy snacks to keep yourself fueled while exploring the vast park. There is a restaurant at Jordon Pond that you can plan to shoot around lunch or dinner time.
A field guide or map of the park could also help navigate between the popular spots and hidden gems Acadia offers. Lastly, bring binoculars for bird watching or observing far-off wildlife.
WHAT TO PHOTOGRAPH
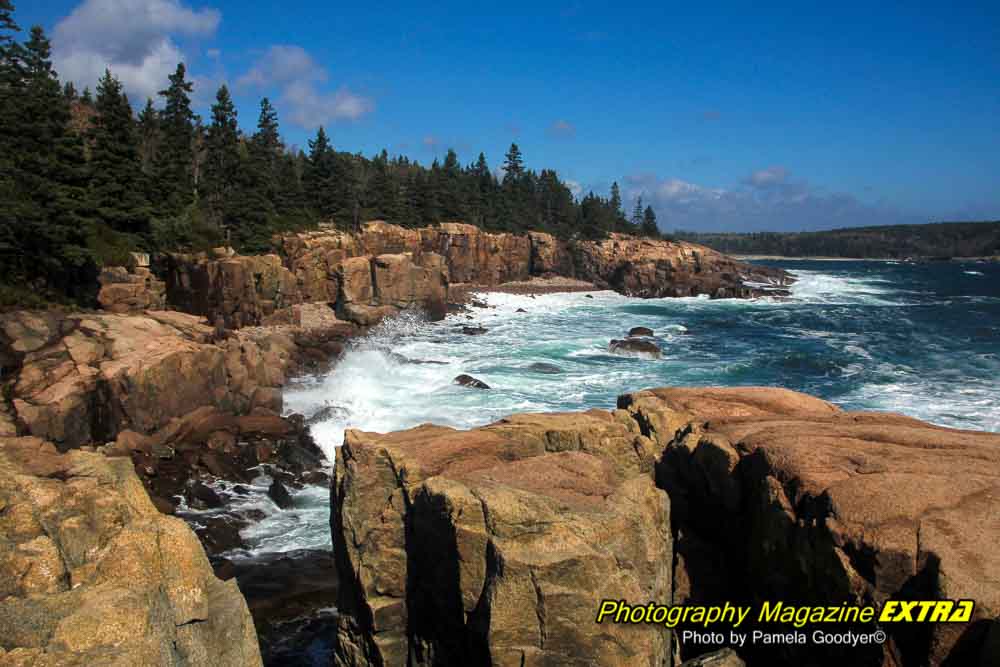
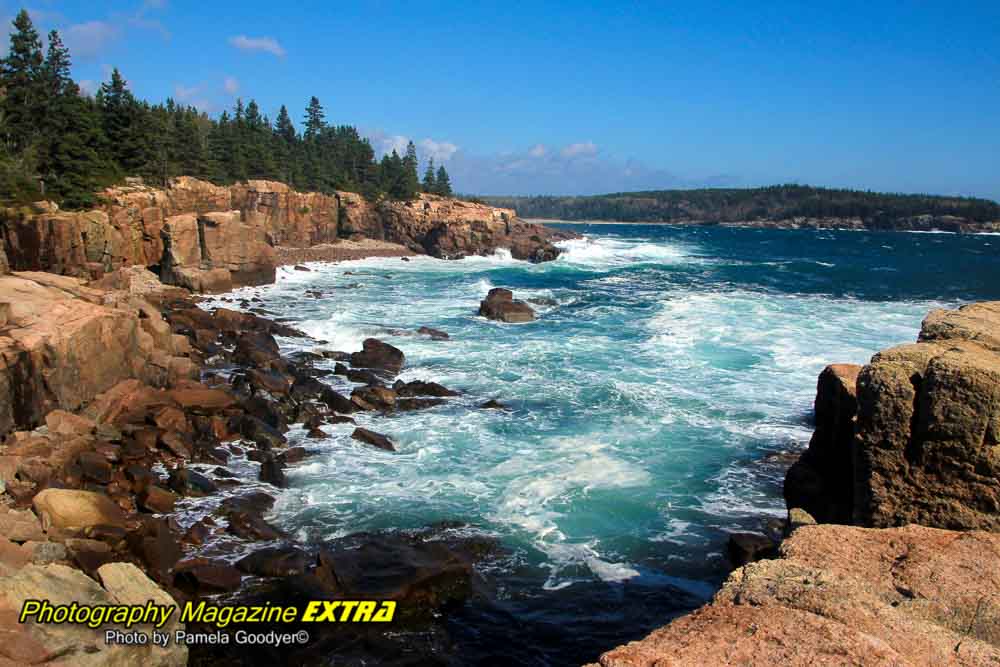
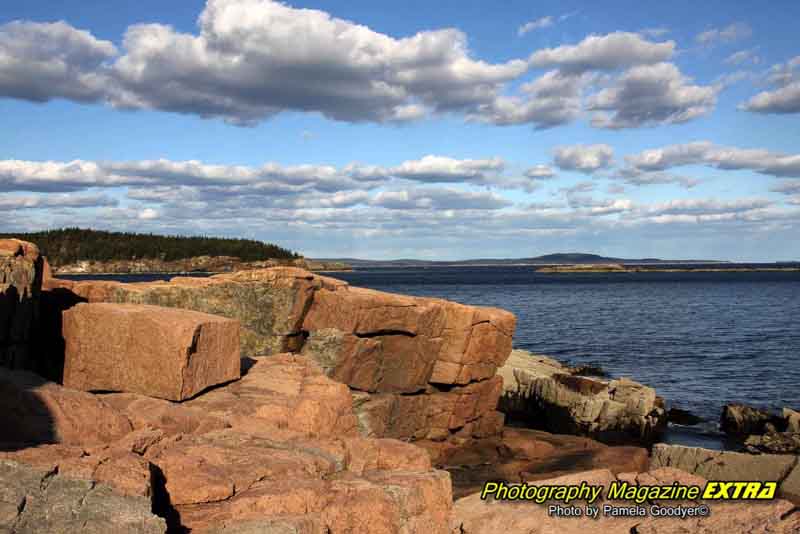
Acadia National Park is renowned for sunrise and sunset views, making it an idyllic spot for landscape photography. The breathtaking beauty of Cadillac Mountain, being the tallest along the North Atlantic seaboard, is a highlight, especially at dawn when it is the first place in the U.S. to greet the morning sun. Still, it’s just a tourist overlook without the dramatic colors of sunrise and sunset. A slow, gradual climb to the summit rewards an unparalleled view where the sun’s first rays paint vibrant colors across the sky and sea. Later in the day, capture the dappled sunlight as it filters down, bathing the forest floor in an ethereal glow, but plan on going when the sky fills with colors.
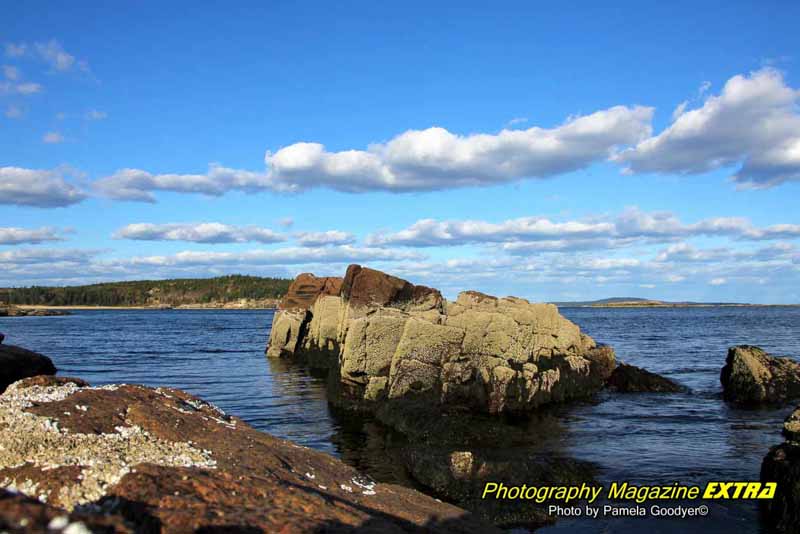
As dawn breaks into daylight, focus on the pristine lakes that dot the park. The reflections of the sky and surrounding wilderness in their calm surfaces create an enchanting mirror image begging to be photographed. Remember Jordan Pond; its sparkling waters often ripple with the movement of beavers and otters that call it home.
Rock Beach is a favorite spot for Milky Way photography, and remember the Bass Harbor Lighthouse for sunset photography and Milky Way.
SEE ALL OF OUR MAINE PHOTOGRAPHY HOT SPOTS TO VIEW INDIVIDUAL LOCATIONS.
DIFFICULTY
A lot of Acadian National Park is easily accessible. Rock Beach has a set of stairs that make it difficult to get down to the beach. The Bass Harbor Lighthouse is challenging to shoot. There are slipper rocks and off-trail rocks to climb down to get to a spot to create a good shot. You can view it from standing near it without climbing down, but you will not get a good shot or be able to see the icon view.
WHAT TO EXPECT
Acadia National Park may bring encounters with creatures such as foxes, white-tailed deer, and an occasional eagle. Don’t look for moose here. They are on the other side of the state. There are massive opportunities for dynamic photography here, especially long exposure and Milky Way photography. It can get very crowded, so book your hotel/motel/cabin in advance.
HOW BUSY DOES IT GET?
As one of the top ten most visited national parks, Acadia sees its fair share of visitors, particularly during the summer when the weather is at its finest. We like Spring and Fall to avoid the crowds, and there are more ways to avoid the crush of people. Opt for early mornings or late afternoons, when most visitors are tucking into their breakfasts or dinners. That’s when the park is quiet. Also, consider exploring some of the less-trodden paths. Even though they might not lead you to the most popular attractions, they can offer you a peaceful sojourn away from the hustle and bustle, letting you bask in the serene beauty of Acadia’s less frequented corners.
MILKY WAY PHOTOGRAPHY
This is one of the best places for photographing the Milky Way. The sky here is incredibly dark, and the Milky Way shines brilliantly overhead at certain times during certain months. Be sure to see our Milky Way Photography Page to go over when the Milky Way is visible.
NEARBY PHOTOGRAPHY
If this wasn’t enough photography, you can take advantage of the nearby rare opportunity to photograph puffins up close near Cutler, Maine. The largest puffin colony on the east coast is not far north of Acadia National Park. Book your tour as early as March for the summer tours. They fill up fast!
HOW TO GET TO ACADIA
BY CAR: To reach Mount Desert Island from the south, follow I-95 north to Augusta, Maine and then take Route 3 east to Ellsworth. Another option is to continue on I-95 north towards Bangor, then take Route 1A east to Ellsworth. From there, continue on Route 3 until reaching Mount Desert Island.
BY AIR: Travelers can take direct flights to Mount Desert Island from Boston’s Logan Airport, which is only 10 miles away from the Hancock County Airport. National airlines are available for those flying into Bangor International Airport, just an hour away from the island. Car rental services are offered at both airports for convenience.
WHERE TO STAY
There are numerous options throughout the park. We will be featuring Hotels, Motels and Cabins here. Please email us to advertise for only $129.00 for the entire year!! You can scroll down for information on where to stay.
OTHER PLACES TO STAY
If you are still looking for somewhere to stay directly next to Acadia, try looking for cabins beyond Acadia, near Ellsworth, Northeast Harbor, or Winter Harbor. Acadia is open year-round, though many facilities inside and near the park are closed from October to the end of May.


 Photography, Lessons, Workshops and Classes.


