
")


Maine to Canada Travel Photography Article
Travel the coast of Maine and Canada.


PLEASE SHARE
At my own expense, I offer all of this to you: a humble tribute to Mother Gaia. It is my hope that you will spread my art and message to others, uplifting and inspiring their souls.
May my works guide photographers in illuminating their path toward creating stunning and impactful images that show the raw beauty and essence of life in all its transcendent glory. —Pamela Goodyer
We traveled this route over several days. First, you will want to check out our Dark Sky Resources page to determine the ideal conditions for milky way viewing before planning your trip.
We have picked dark sky locations for you, but you will have to check the new moon/moonrise charts and be sure to go in a suitable month with a clear weather forecast to photograph the milky way. We suggest you make this trip during the milky way week of the month from May through October when it is visible. It was a beautiful stretch of perfect weather during the week of meteor showers in August 2015. As a result, you will see many meteors in our images.

With 65 historical lighthouses still existing along the 5,000 miles of coastline, Maine is known as the Lighthouse State. Many of them are not accessible since you must take a boat tour to see them for the best images. You can get some good shots with zoom lenses from the mainland at some locations, but you need to be at a decent distance to do good nighttime Milky Way photography, so not all lighthouses are ideal. Here are our favorites where you can stand next to the lighthouse and get your images.

Cape Neddick Lighthouse, or Nubble Light, is just a few hundred feet off York Beach, and many tourists come to see its beauty. When we were there, late in the season, the Milky Way was in the opposite viewing direction, so go early in the season.
In 1879, during the presidency of Rutherford B. Hayes, permission was granted for constructing a lighthouse on Cape Neddick. The tower stands on the northern side of “The Nubble,” a popular fishing spot just 600 feet away from the coast of York.
From this vantage point, one can also catch glimpses of the impressive natural wonders of The Devil’s Oven, Bald Head Cliff, and Pulpit Rock. These unique rock formations have captivated local fishermen for generations.
The oldest lighthouse in Maine is located inside Fort Williams – 1000 Shore Road, Cape Elizabeth, ME 04107 – Welcoming nearly a million visitors annually. It is not a location we stopped at for an extended visit. We found this lighthouse along our trail, but unfortunately, this park closes at dusk, so we don’t plan on doing any Milky Way photography here.
The Portland Head Lighthouse is a good stopping point along the trail to get daytime images. There is a food truck with a very long line, a hike along the coastline, and a few other things to photograph.

It is not an ideal location with our high standards. Unfortunately, we include it only as a place to get a few photos, see some history, visit their museum, and be a tourist for a short time. Yes, you can get some good images, and it is a beautiful place. You can get a few good photos with long exposure to the lighthouse’s water, but not too much more than that. Don’t plan too much time for this stop for photography.

This is a great little spot due to its colors. You can shoot this location a hundred times and edit it so many ways, and it still looks wondrous. It is a tiny town. You can miss this spot as you drive through. It should be on your list of stops. Why would you drive by this beauty? It is right in the center of a very small town.
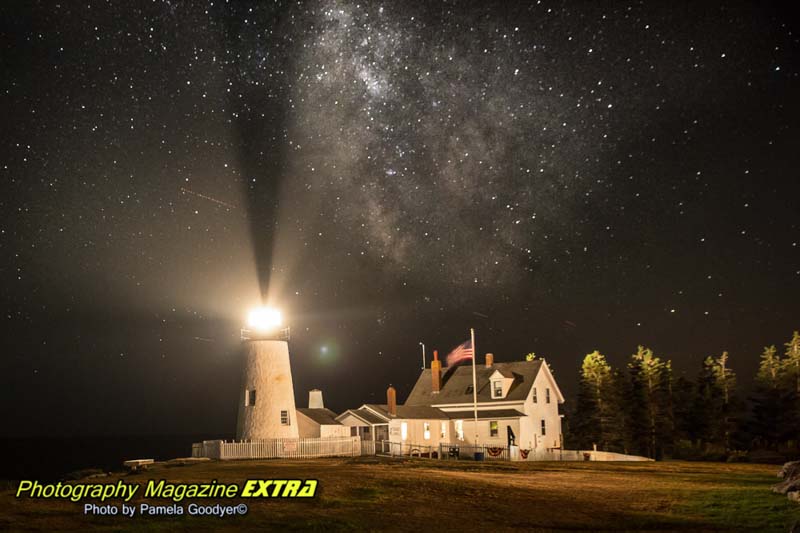
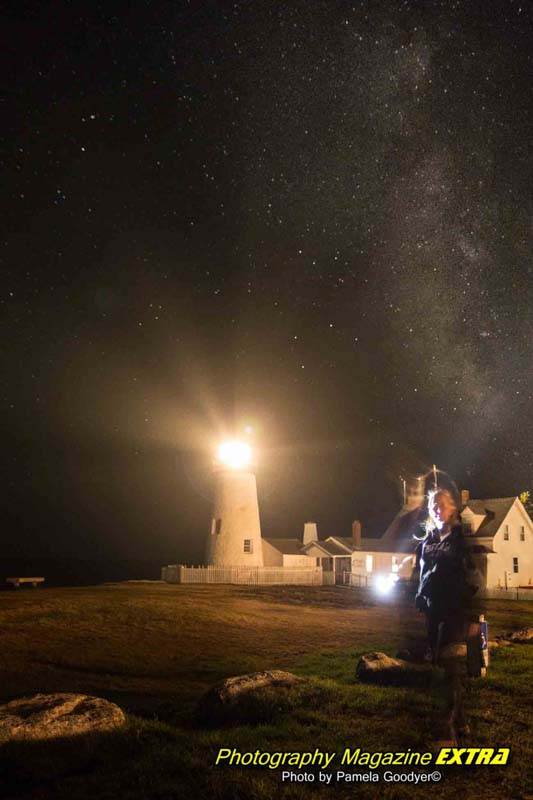
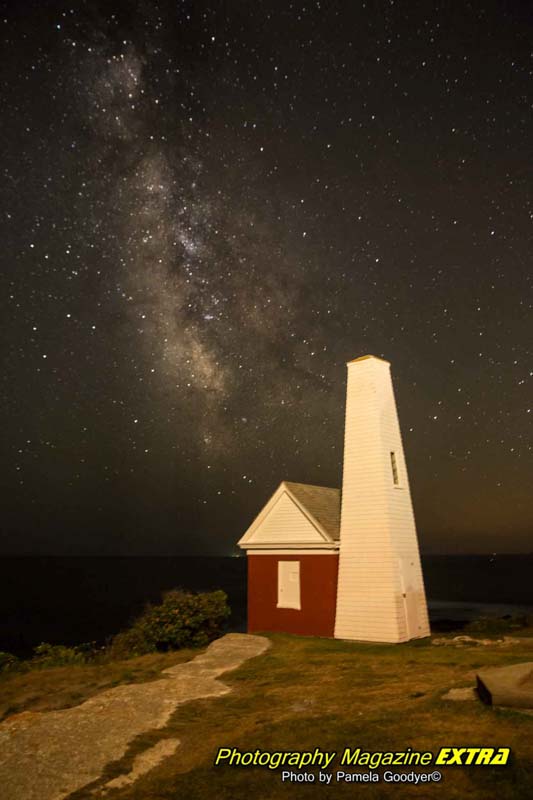
This is in a dark sky area, away from light pollution. The best time to photograph the Milky Way is during the summer when the constellation is visible in the night sky. Use a tripod and set your camera to a long exposure for a good photo. You may need a higher ISO setting to capture all the stars. Complete Milky Way Photography Information is here.
The Bristol Parks and Recreation Department operates the lighthouse and outbuildings as Pemaquid Point Lighthouse Park. This is one of our favorites to photograph along the Maine Coast. Also, it makes dramatic daytime pictures. It has pretty outstanding Milky Way shots. This tranquil location is off the beaten path, and tourists do not overrun it. You can also take a puffin tour during the daytime. Be sure to bring your zoom lens. You don’t get too close to the puffin.
The keeper’s house is now the Fishermen’s Museum at Pemaquid, containing displays and artifacts of the lighthouse and local maritime history. Opened in 2008, the Learning Center is a community resource for offering movies, classes, and concerts. Other park activities include picnicking and viewing local paintings at the Pemaquid Art Gallery.

Highly sought-after renowned photographer Pamela Goodyer will lead a select few—not more than six chosen ones—on a journey of grandeur by private jet and helicopter. Cast away the mundane and accept her invitation into opulence, indulging in five-star hotels for an experience like no other!
SEDONA ARIZONA
CANADIAN ROCKIES
ACADIA NATIONAL PARK
GREAT BEAR RAINFOREST & MORE


These structures have long fascinated locals and visitors alike, from the picturesque Portland Head Light to the historic Ram Island Ledge Light.
Over 60 lighthouses dot Maine’s coastline, each with its unique history and story. Many are still operating, while others have been converted into museums or Bed & Breakfasts.
Whether you’re a professional photographer or an amateur taking pictures for your collection, photographing lighthouses is always a popular subject. But because each one is different, knowing how to approach shooting them can be tricky. Be sure to read our Milky Way information because it is imperative to know the right time to go to photograph the Milky Way.
A trip to Maine to photograph these magnificent structures is a must if you’re a photography enthusiast. Here are some tips on how to get the best shots.
First, timing is everything. The best time to photograph them is during the golden hour, the hour before sunset, and the hour after sunrise. The lighting during these times is softer and more flattering and will make your photos look amazing.
Second, choose your composition carefully. Lighthouses are often photographed from afar, with the ocean or coastline in the background. But don’t be afraid to get up close and personal with your shots — sometimes, the most exciting photos are taken close up. Experiment and see what looks best. It’s digital, so shoot away. We prefer to fill the page with the images.
Have you ever wanted to photograph the Milky Way? Well, if you find yourself in Maine, you’re in luck! Maine is home to some of the most beautiful and iconic lighthouses in the United States. And what’s even better is that they offer some of the best night sky views.
If you’re interested in photographing the Milky Way, you should keep a few things in mind. First, you’ll need to find a location with little light pollution. Second, you’ll need to plan your shoot around the moon cycle. The best time to photograph the Milky Way is during a new moon when the sky is darkest or the week before the new moon when the moon rises in the daytime and is below the horizon at night.
Once you’ve found a dark location and planned your shoot around the moon cycle, it’s time to set up your camera. For best results, use a DSLR camera with a wide-angle lens. Set your ISO as low as possible and your shutter speed to about 20-25 seconds. If you’re unsure how to set up your camera for Milky Way photography, we can guide you through it; see the yellow link – How to shoot the Milky Way or view basic instructions below.
Once your camera is set up, it’s time to start shooting. MORE DETAILS BELOW.

For Emergencies or Camping


You will need a camera to manually control your ISO, shutter speed, and aperture.
A fast, wide-angle lens of 1.4 – 2.8 is ideal. If you use a 3.5 or higher (slower lens), you must increase the ISO. The higher the ISO, the more grain or digital noise or grain will appear in your photos.
A good, sturdy tripod is essential for night photography. If it gets windy, you will need a sturdy one. Remember that when you buy one, it should be sturdy enough to withstand the wind but small enough to fit in your suitcase.
Sky Guide is available through the iTunes Store for $1.99. It has a 5 out of 5-star rating on both the current (3.2) version (1200+ ratings) and all previous versions (8600+ ratings).
Our choice is Coast brand for flashlights. The ideal flashlight will have high lumens, and you can zoom in and out on the light emitting from the flashlight. Get the HP7, PX45, or the G50. Ideally, go with the HP7.
The best time to go is during a new moon; you want to be in the darkest area possible. The week before the new moon, when the moon has not risen, is a perfect time to go, so be sure to check the moonrise chart to see when the moon will be up.
When painting with light and over a 30-second exposure, you must have a shutter release to use your bulb mode. When exposing your pictures in general, you can use the remote release or use your camera’s built-in two-second timer.
Start with ISO 1600 – 3200. This is just a common starting point, and you will adjust from here.
Shutter Speed – Remember, the earth is rotating. If you leave the shutter open for too long, you will see star trails that will not make for a crisp image. We want crisp, non-star trail images. Here is the formula to avoid star trails—the 500 rule – Divide 500 by the focal length of your lens. So, if you have a 24mm lens on a full-frame camera, you will set your shutter speed to 20 sec. (500/24 = 20.83). If you are using a crop sensor camera, first do the math of the crop sensor to find the focal length. Cannon is 1.6, Nikon is 1.5. Convert to full-frame focal length, then use the formula. Nikon 18mm x 1.5= 27mm – 500/27 = 18.51 seconds.
Depth of field isn’t critical on these shots, but letting the light into the camera is; therefore, you should shoot wide open if. If the depth of field is essential to you, try not to go too high. (wide open =the lowest aperture your camera will allow). You will have to increase the ISO some, giving you digital noise.
Now that the ISO and aperture are set in manual mode, roll your shutter speed until your meter reads (0) zero. Take a test shot and adjust from there. Remember, the earth is rotating. If you leave the shutter open for too long, you will see star trails that will not make for a crisp image. You can make star trails specifically, but that’s not what we are going for here since we started with Milky Way photography. We want crisp, non-star trail images when doing this.
Here is the formula to avoid star trails—the 500 rule – Divide 500 by the focal length of your lens. So, if you have a 24mm lens on a full-frame camera, you will set your shutter speed to 20 sec. (500/24 = 20.83). If you are using a crop sensor camera, first do the math of the crop sensor to find the focal length. Cannon is 1.6, Nikon is 1.5. Convert to full-frame focal length, then use the formula. Nikon 18mm x 1.5= 27mm – 500/27 = 18.51 seconds.
In live view mode, you can change your white balance settings and see what it will look like. You can shoot in shade or cloud mode as a standard setting and adjust things later when editing.
To focus in the dark, use your camera’s live view, hit the zoom button, and focus on a bright star. You can also use the infinity setting on your lens but do several test shots to determine accuracy. It can be off a little on some lenses. You can also light it up with a flashlight, focus, then gently, without touching the focus ring, put the camera in manual focus so it will not search for the focus. You must do this each time you move your camera to take your next angel.
The best images are usually of the dense part of the Milky Way. We can see this part of the milk way in the southern sky. During March, April, and May, the Milky Way rises above the horizon in the pre-dawn hours. In June, at about 10:00 p.m., you will see the Milky Way. From July until October, you can see the Milky Way as soon as it sunsets, and it becomes dark enough to see about an hour after sunset. In November, the Milky Way no longer comes above the horizon. You will have to wait until March if you want to stay away really late or get up early to see her again.
See our Milky Way Hot Spot Locator and our Night Photography Information.
Bailey Island is an island in Casco Bay, and a part of the town of Harpswell, in Cumberland County, Maine. The island has a year-round population of over 400. Although this island has no lighthouses, this is a tremendously dark-sky location.
Lands End Gift Shop is located at the southernmost tip of the island; there is an excellent view of rugged rocks, a statue, and a blaring milky way above. Check it out during the daytime and visit the store simultaneously to prepare for your nighttime milky way shots. Furthermore, there are several bays with boat docks to photograph with exciting angles. If you get some puffy white clouds, you could get some good stuff on this island.
Where to eat and do sunset photography – More’s Cribstone Grill – Go here. Go early. It is the most popular place. We could not wait because we showed up at prime time. We went down the street to an area with one car in the parking lot. Starving to death, we gave it a try. Now I know why there was one car in the parking lot. Don’t go to Giant Stairs Seafood Grille. You will most likely be disappointed. Go early to Moree’s
The Driftwood Inn – You can shoot Milky Way photography down the street or at your front door. We liked the atmosphere and the breakfast at this location. It was an excellent bang for your buck, and the milky way is yelling outside on the grounds with many deliciously sounding waves crashing at the base of the location. Be quiet when you are late at night steps from your room doing milky way photography, but the wave sounds will drown out your noises. The Inn is different from any you have known with its oceanfront location on the outermost island in Casco Bay. Driftwood is the oldest Inn on Bailey Island and has continuously operated for over 100 years. Our three acres offer space for relaxation, the sun, and fresh sea breezes. Bailey Island is
two and a half miles long by a one-half mile wide, with various picturesque views and breathtaking sunsets.
 Photography, Lessons, Workshops and Classes.


