Dark Sky Photography Information
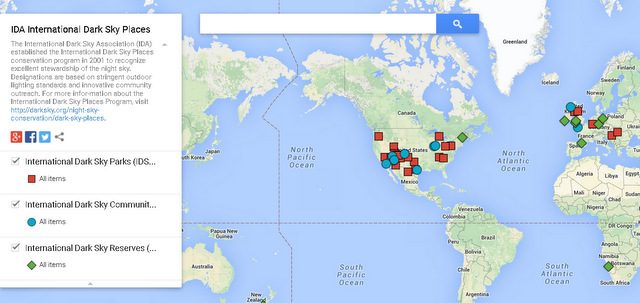
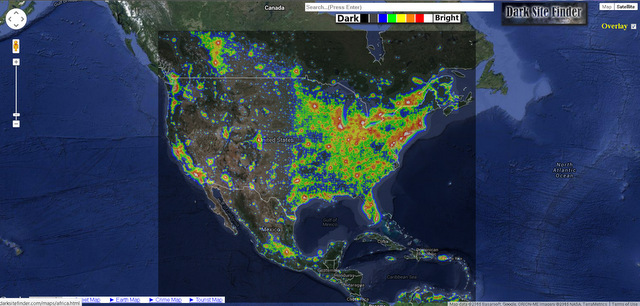
Below are a few different resources you can use to locate the following location for your dark sky photography adventure. The essential part of Milky Way photography is finding the darkest skies. See the dark sky map below. The darker the skies, the more you will see the Milky Way in your image. The week before the new moon, the moon rises very late, or should we say early the following day, so the moon is not out, and this is when you want to do your Milky Way photography.
When to See the Milky Way
November, December, and January are not ideal for views of the best part of the Milky Way. The best part goes below the horizon and will not reappear until about March during the very early morning hours. The best viewing time in the Northern Hemisphere is in the summer. Hot, humid, or stormy nights make for less ideal conditions, and the nights are shorter, but there is still ample opportunity to get it right. A planisphere tool can help locate and determine when the dense part of the Milky Way will be visible.
During April and May, you can see the Milky Way in the pre-dawn hours. By June, it will rise at about 10:30 and be visible almost all night. From mid-August through September, the best time is soon after the sun has set, and the sky has grown dark about an hour after the sun goes below the horizon.
Go to the International Dark-Sky Places Map.
Sky at a Glance – Some good info to check out current information.
Go to the Dark Sky Finder Map. The first part of doing night sky or Milky Way photography is to find a dark location. These maps are all a little slow, but you will find your Milky Way photography spot using them.
Certified International Dark Sky Parks
Natural Bridges National Monument – Utah, USA
Cherry Springs State Park – Pennsylvania, USA
Galloway Forest Park – Scotland, UK
Zselic National Landscape Protection Area – Hungary
Goldendale Observatory Park – Washington, USA
Clayton Lake State Park – New Mexico, USA
Hortobagy National Park – Hungary
Observatory Park – Ohio, USA
The Headlands – Michigan, USA
Big Bend National Park – Texas, USA 2012
Death Valley National Park – California, USA 2013
Chaco Culture National Historical Park – New Mexico, USA 2013
Northumberland National Park and Kielder Water Forest Park – Northumberland, England
Eifel International Dark Sky Park – North Rhine-Westphalia, Germany 2014 Provisional
Mayland Community College Blue Ridge Observatory and Star Park
North Carolina, – Parashant International Night Sky Province – Arizona, USA 2014
Hovenweep National Monument – Utah-Colorado, USA 2014
Copper Breaks State Park – Texas, USA 2014
Enchanted Rock State Natural Area – Texas, USA 2014
Oracle State Park – Arizona, USA 2014
Weber County North Fork Park – Utah, USA 2015
Capitol Reef National Park – Utah, USA 2015
International Dark-Sky Parks
California – An International Dark Sky Community in California, USA, was established in 2009.
International Dark-Sky Parks continued.
Quebec Canada – A Silver-tier International Dark Sky Reserve in Quebec, Canada, established in 2008.



 Photography, Lessons, Workshops and Classes.