Waterfall Photography Simplified
Quickly learn how to shoot waterfall photography


PLEASE SHARE
At my own expense, I offer all of this to you: a humble tribute to Mother Gaia. It is my hope that you will spread my art and message to others, uplifting and inspiring their souls.
May my works guide photographers illuminating their path toward creating stunning and impactful images that show the raw beauty and essence of life in all its transcendent glory. —Pamela Goodyer
With its stunning landscapes and vistas, the park is a great place to capture some beautiful shots. There are plenty of great spots within the park to snap some photos, including:
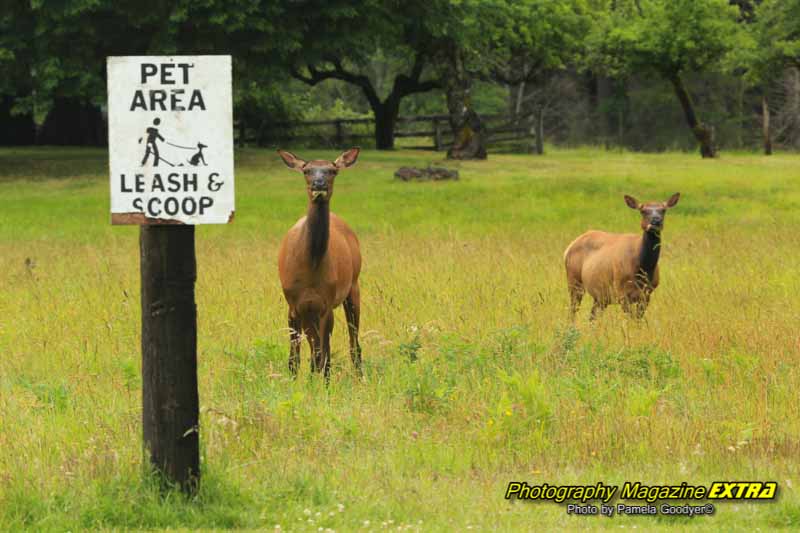
Mount Rainier National Park is in Washington State, a great state. We loved this trip; although we hit a lot of rain in June, it was still incredible. Some rainforest areas that the staff fell in love with that changed our whole perspective on rain. The elk just blew us away. We stood with this pack of elk for over an hour with our Canon 100-400mm lenses. We were all waiting for the baby to wake up and stand up. Mama fell asleep while we were next to her, telling her to wake up the baby. They let Pam right into the herd.
The mountain rises quickly, with elevations of a little over 14,000 feet. There are valleys, waterfalls, and more than 25 glaciers. There was a volcano that we didn’t see. It was shrouded in clouds. There are enormous amounts of rain and snow in this park. That’s what makes unbelievable rainforests possible.
Mount Rainier Is known for:
• Breathtaking vistas, forests, and waterfalls.
• In the extreme west of Washington state.
• National Park visitor center.
• More than five million visitors.
• A portion of the park was designated a national conservation area.
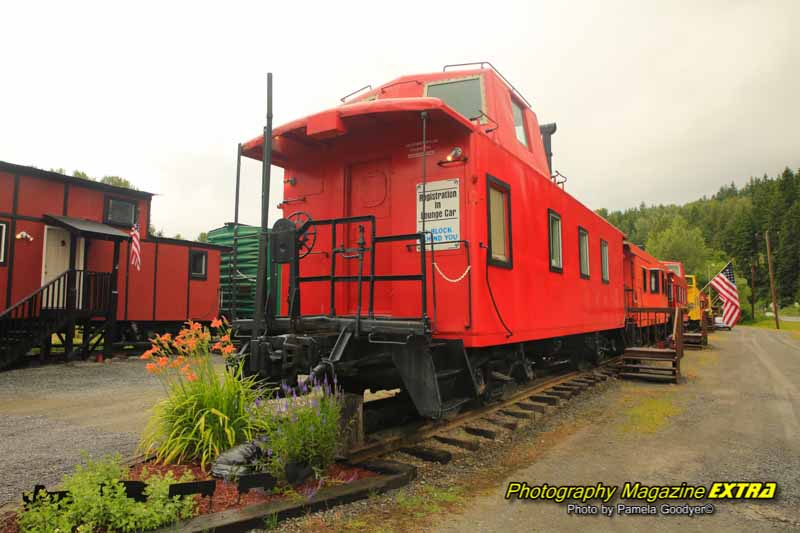
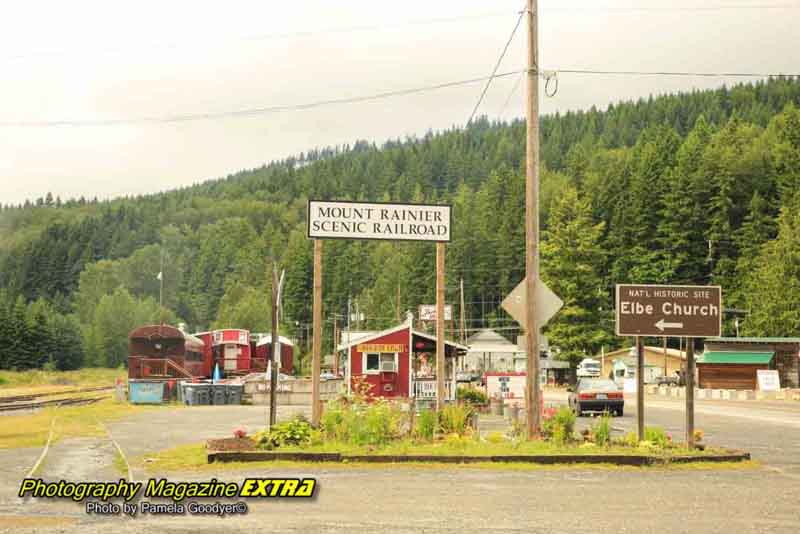
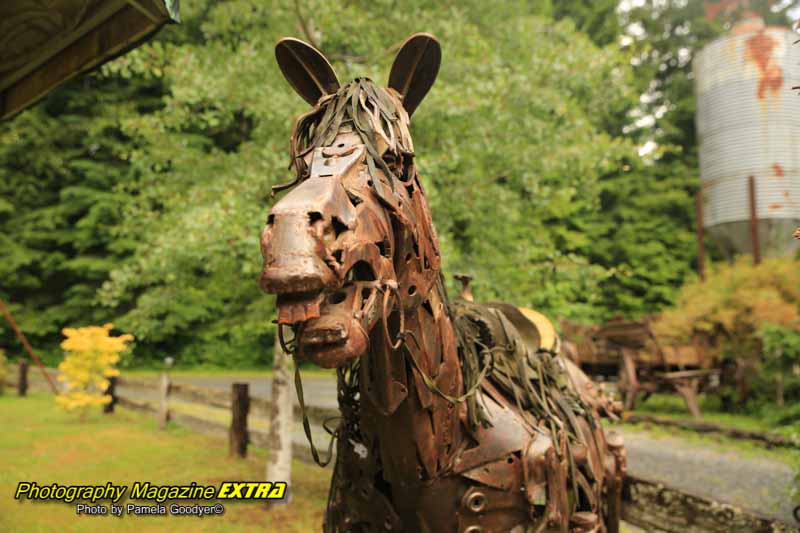
There are a few spots along the way for photography. Nihilo Sculpture Park, just outside Mt. Rainier National Park, is the brainchild of Washington artist Daniel Klennert. This is a must-stop spot, especially if you are an artist. If you are traveling with family, they can stay busy while you have time to take some pictures. Right past there, on the way to the park, stop here and pick up some goodies. It’s all one road, so you can’t get lost.
Reflection Lake, Upper and Lower Tipsoo Lakes, and Little Tipsoo Lake offer spectacular mirrored reflections of the majestic mountain that will take your breath away.
The trail to Mazama Ridge is easily accessible from the Paradise Meadows parking lot by the Skyline Trail or from lower viewpoints at the Reflection Lakes. Dawn brings an awe-inspiring sight of Mount Rainer reflecting in Tissoo Lake, surrounded by vibrant red blooming plants. Multiple parking lots give photographers different perspectives to capture this magnificent scene as they journey along these classic routes in this untouched wilderness.
The trails snaking their way up Mt Rainier from Paradise Visitor Center are not too steep, with summer wildflowers blooming in thousands of colors as a backdrop. Taking the bridge over the river, a meadow appears, where if you look in the opposite direction of Mount Rainier, you can spot the majestic Tatoosh range.
Sourdough Ridge sits just above the visitor’s center, untainted by artificial lightsofferingrs dazzling views.
Silverfort Trail surrounds Sunrise District, winding its way between lush forests and sensational vistas. It provides breathtaking views of Rainier’s silhouette, White River, Emmons Morraine Glacier, and the valley stretched below.
A wedding photoshoot at the legendary Paradise Lodge awaits those lucky enough to visit the National Park.
We arrived during winter when fog blanketed the mountain like a thick grey blanket. If you’re seeking sunrises, sunsets, and stars that will take your breath away, then Sunrise Area at Mt. Rainier National Park should be at the top of your list. You’ll probably have better luck with weather conditions than we did.
Located within the boundaries of Mount Rainier National Park, Eunice Lake is a hidden gem waiting to be discovered. This serene body of water boasts breathtaking views and several hiking trails for adventurous souls. To fully experience its beauty, consider staying at one of the nearby cabins for an extended visit and capture stunning shots during sunrise. As a nature lover and photographer, I highly recommend this spot for anyone seeking a peaceful escape in the great outdoors.
Before embarking on a journey here, careful consideration must be given to the current season, weather conditions, and peak tourist times. As a word of caution, the months between November and March are not recommended for visiting as they bring heavy snowfall and bitterly cold temperatures that impede travel and limit access to certain parts of the park.
The park gets filled to capacity in the summer months. But you can experience the breathtaking beauty during the summer when the weather is most pleasant. Average temperatures rise from a crisp 54.7°F in June to a comfortable 64.5°F in August, with lows ranging from 36.2°F to 43.9°F respectively. The chance of rain is minimal, with only 4.1in June and an even lower 2 in July and August. Plus, there’s no need to worry about snow as it rarely falls, measuring just 5.6 inches in June and a mere 0.1 in August.
Traveling during the summer can be challenging, especially on sunny weekends. Parking can be scarce or impossible to find in popular areas such as Paradise, Sunrise, Grove of the Patriarchs, and trailheads between Longmire and Paradise. To avoid congestion, visit these areas on weekdays and arrive early in the day. If possible, carpooling to the park is also recommended. Keep in mind that parking is not allowed along the road edges.
During winter, many roads in the park are closed for safety reasons. The road to Paradise closes nightly, and driving conditions are often treacherous with snow and ice. All vehicles are required to carry tire chains for added traction.
For those on a budget, the most affordable time to visit is December or January. Accommodations can also be found at reasonable rates, averaging around $120 per night, with added perks like breakfast included at select hotels.
– Visit on weekdays and avoid peak hours
– Have an alternate plan in case of long lines or delays
– Use the NPS App to find nearby destinations within the park
– Consider using an annual pass to minimize entrance station wait times
– Check for road closures before traveling
You can easily spend a full two days at the park photographing. Of course, it all depends on how much hiking you do and what else you like to do.
Everything! There are long-exposure waterfalls, wildlife, macro photography, and Milky Way opportunities so that you will need all your gear—tripod, zoom lens, wide-angle lens, ND filters, extra batteries, and memory cards.
Hiking boots, bug spray (seasonally), cold weather gear, and temperatures can suddenly change.
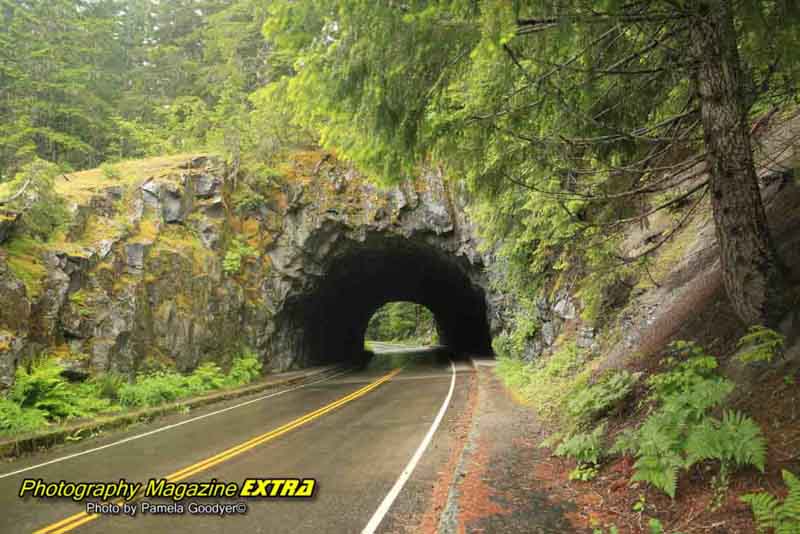
We visited the park on Route 706 East. This great little town on the way in has some spots you will want to stop and photograph. To reach the Nisqually entrance using GPS, use the address 39000 State Route 706 E, Ashford, WA 98304. This will take you on SR 706 east past the park headquarters to the Nisqually Entrance. It is recommended that visitors refer to road maps in addition to using GPS units when driving to the park.
DATES and HOURS OF OPERATION
Call the park at 360-569-2211 to confirm road and facility status, or check the website for current information. Some roads close during the snow season, and information changes seasonally. SEE THE CURRENT DETAILS HERE.
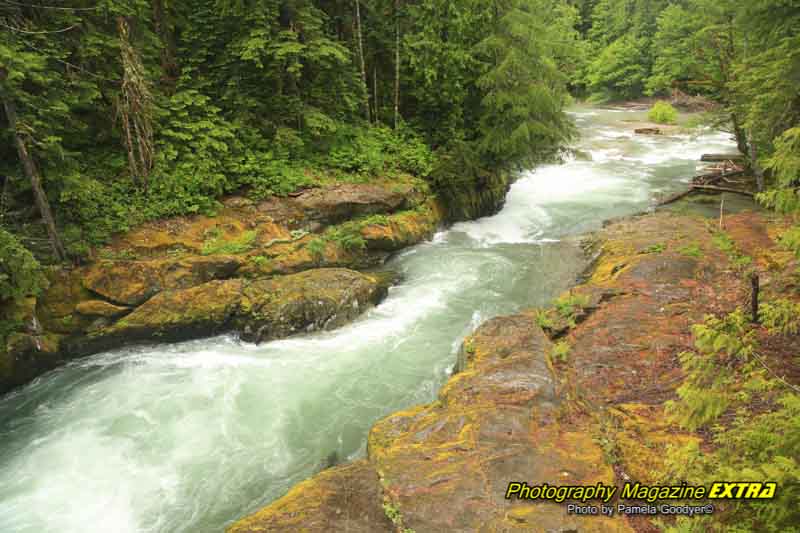
This spot is not to miss. There are few places to park off this busy spot, but you should find enough parking if you get there early on a weekday. We enjoyed this spot for about an hour, and it was one of the only picturesque areas we found on our journey. We visited this day solely to photograph it. It was cloudy/foggy and rainy that day, so we did not experience some of what the park offers viewing-wise.
We had to find the exact place to see the falls without the tree limbs our way. This first picture was shot at four sec. f/22, ISO 100. f/22 and ISO 100 are standard for your waterfall photography, and you must be on a tripod to do a long exposure. Your shutter speed will vary depending on your filter. We like the Tiffen 1.2, which we used here. It only gives a slight color cast and is easily correctable. It was enough on a cloudy/rainy day to easily allow a 4-second exposure. See Neutral Density Filters and learn about them here if you are unfamiliar. Have some lens clothes handy when shooting in the rain, and don’t forget your lens hood and camera raincoat.

Paradise Inn is perched atop the peak of the park. The rain was coming down steadily, and it soon became apparent that a retreat down the winding mountain roads would mean another hour of travel, so we decided to stay. We were not disappointed; the food was delicious, the presentation superb, and the service impeccable – an 8 out of 10! But it did come with a hefty cost: set in the middle of nowhere, this rustic lodge was a little pricy, but look at the location. Even without a television or internet, we found solace in the library of this luxurious oversized log cabin.

Still, our reprieve was short-lived as their paper-thin walls meant even the slightest whisper could be heard by staff members making their rounds. Our room proved rather small for 117 dollars per night – no bathroom included – and I can only imagine what faults could be found in the $267 rooms. (2015)
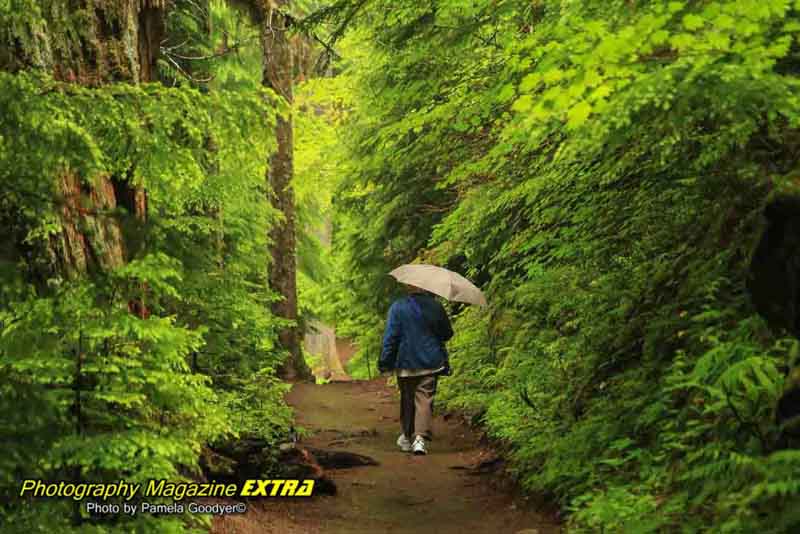
If you have moving subjects, you will want to shoot in shutter priority to ensure your shutter speed is high enough to have your subject in sharp focus. Approximately 1/250th of a second is appropriate for people walking by, and adjust your ISO accordingly. If they are running fast, increase your shutter speed to about 1/500th of a second. A fast bird flying by would be shot at about 1/1000th of a second. If it’s a bright sunny day, go as high as 1/1200th of a second. Remember, the higher your shutter speed, the less light comes into the camera. It should not be an issue outside during daytime hours. For More Details, see our Shutter Priority Page.
You have moving waters here. You can do your long-exposure running and milky water shots. You will have to use a tripod for this effect. Your settings will vary depending on the lighting and your neutral density filter. You will shoot in manual mode for the milky waters. ISO is always 100 or as low as your camera will allow. The aperture is f22. Your shutter speed will be the only variable depending on the light. Roll your shutter speed until your meter reads zero. (In the center) Use your shutter release or your 2-second timer to prevent camera movement when exposed. You will want at least a 2-second exposure for milky water. If you don’t have a neutral density filter, you may not get more than 1/15th of a second in the sun. We highly suggest you do not go anywhere without one. It makes all the difference between lifeless images and outstanding, dynamic images.
Aperture Priority is often used to blur the background of your images and control your depth of field (how much from the subject to the background is in focus). For more information on this – see our Aperture page
The higher you set it, the more light comes in when exposing an image. The higher the number, the more digital noise, so if possible, stay below 800. If you need to go higher to get the shot, you can use Topaz Denoise to filter out the digital noise later.

Please have a look below for some options. This spot is reserved for advertising. Do you want us to send our photography friends to your hotel for their photography? Put your hotel information here. We will put pictures of your hotel, the website link, the phone number and your information on your hotel.
Please send us an email. You will be surprised at how affordable our prices can be.
Longmire
The National Park Inn at Longmire includes a restaurant that is usually open year-round and serves breakfast, lunch, and dinner. This is the only in-park dining facility that is open all year.
Adjacent to the National Park Inn, the Longmire General Store offers a limited selection of groceries, camping supplies, gifts, and souvenirs.
Paradise
The Paradise Inn includes a restaurant and a small cafe. Like the Inn, the restaurant and the cafe are open only from May to early October. The restaurant serves breakfast, lunch, dinner, and Sunday brunch. The cafe offers hot drinks, grab-and-go meals, and other quick food items.
The Paradise Camp Deli, a cafeteria in the Jackson Visitor Center at Paradise, is usually open on weekends and holidays in the winter and daily from May through early October.
Sunrise
The Sunrise Day Lodge includes a snack bar. Sunrise Day Lodge is usually open from July through September.

Entrance Fee (Standard Entrance Pass)
| Type | Dates | Cost |
|---|---|---|
| Private Vehicle | Year-round | $30.00 |
| Motorcycle | Year-round | $25.00 |
A timed entry reservation is required for two areas of the park: (1) Paradise Corridor coming from the southwest (near Ashford, WA) or southeast (near Packwood, WA), and (2) Sunrise Corridor coming from the northeast (via Enumclaw, WA) from 7:00 am to 3:00 pm. Each corridor requires a separate vehicle reservation. Timed entry reservations are for a single day per vehicle and are required in addition to an entrance fee or park pass.
| Type | Dates | Cost |
|---|---|---|
| Paradise Corridor Reservation | May 24–September 2 | $2.00 |
| Sunrise Corridor Reservation | July 4–September 2 | $2.00 |

Add your campground here.
Do you want us to send our photography friends to your campground to stay during their trip? Put your campground information here. We will put a picture of your establishment, the website link, the phone number, and the information on your campground to make it easy for our photographers and ghost hunters to find you.
Would you like to be featured in an article as a place to stay while doing photography or ghost hunting? If so, please send us an email. You will be surprised at how affordable our prices can be.

Adjacent to the National Park Inn, the Longmire General Store offers a limited selection of groceries, camping supplies, gifts, and souvenirs.
Do you want us to send our photography and ghost-hunting friends to your Restaurant after their ghost-hunting or photography trip? Put your restaurant information here. We will put a picture of your establishment, the website link, the phone number, and the information on your Restaurant to make it easy for our photographers and ghost hunters to find you.

Don’t forget that you can use a rain sleeve on your camera if it is raining. If it is bright and sunny, you want to use a low ISO such as 50 or 100.
If you photograph cloudy days, you can do running water or waterfall photography to help avoid the glaring sun. You can also use an ND filter to get long exposure for dramatic effects, even in the sunshine. If you ghost hunt indoors in abandoned places, be careful!
 Photography, Lessons, Workshops and Classes.


