How to Shoot The Milky Way – Photography
Milky Way Photography Information


Milky Way Photography Information
The Milky Way is our galaxy, full of stars that sparkle in the night sky. When we look towards its center on a dark evening, we can see a bright, milky cluster of stars and dust. Astrophotographers take pictures of this phenomenon, utilizing long exposure techniques to create captivating night sky images. To get the perfect shot, you must be in the right location with the correct gear and patience to make a masterpiece. The most important thing is to know is when to do Milky Way Photography and how to see it.
Months: The Milky Way Core can be seen from March to October, disappearing below the horizon for the rest of the year. It appears in the early morning hours in March and becomes visible earlier each month. The best time to catch a glimpse of the core is during summer when it can be seen immediately after sunset, providing an ideal viewing opportunity for stargazers and photographers.
New Moon: Timing is crucial to seeing the Milky Way. This celestial event can only be seen on clear nights without a visible moon, limiting the window for viewing. The moon rises during the day and sets at night the ten days before the new moon each month. CHECK THE NEW MOON SCHEDULE HERE.
Light Pollution: The best way to experience the full wonder of the Milky Way is to escape from areas with heavy light pollution. However, it may be possible to see some faint traces of the galaxy from places with mild artificial lighting; the most spectacular views can be found in remote locations far from cities and civilizations. Check out our How to Section for more details, including using a light pollution map to guide you to dark sky locations. See the light pollution map link below.
You will need a camera to control your ISO, shutter speed, and aperture manually.
A fast, wide-angle lens of 1.4 – 2.8 is ideal. If you use a 3.5 or higher (slower lens), you must increase the ISO. The higher the ISO, the more grain or digital noise or grain will appear in your photos.
A good, sturdy tripod is essential for night photography. If it gets windy, you will need a sturdy one. Remember that when you buy one, it should be sturdy enough to withstand the wind but small enough to fit in your suitcase.
Sky Guide is available through the iTunes Store for $1.99. It has a 5 out of 5-star rating on both the current (3.2) version (1200+ ratings) and all previous versions (8600+ ratings).
Our choice is Coast brand for flashlights. The ideal flashlight will have high lumens, and you can zoom in and out on the light emitting from the flashlight. Get the HP7, PX45, or the G50. Ideally, go with the HP7.
The best time to go is during a new moon; you want to be in the darkest area possible. The week before the new moon, when the moon has not risen, is a perfect time to go, so be sure to check the moonrise chart to see when the moon will be up.
When painting with light and over a 30-second exposure, you must have a shutter release to use your bulb mode. When exposing your pictures in general, you can use the remote release or your camera’s built-in two-second timer.
Start with ISO 1600 – 3200. This is a common starting point, and you will adjust from here.
Shutter Speed – Remember, the earth is rotating. If you leave the shutter open for too long, you will see star trails that will not make for a crisp image. We want crisp, non-star trail images. Here is the formula to avoid star trails—the 500 rule – Divide 500 by the focal length of your lens. So, if you have a 24mm lens on a full-frame camera, you will set your shutter speed to 20 sec. (500/24 = 20.83). If you are using a crop sensor camera, first do the math of the crop sensor to find the focal length. Cannon is 1.6, Nikon is 1.5. Convert to full-frame focal length, then use the formula. Nikon 18mm x 1.5= 27mm – 500/27 = 18.51 seconds.
Depth of field isn’t critical on these shots, but letting light into the camera is; therefore, you should shoot wide open if. If the depth of field is essential to you, try not to go too high. (Wide open =the lowest aperture your camera will allow.) You will have to increase the ISO a little, which will give you digital noise.
Now that the ISO and aperture are set in manual mode roll your shutter speed until your meter reads (0) zero. Take a test shot and adjust from there. Remember, the earth is rotating. If you leave the shutter open for too long, you will see star trails that will not make for a crisp image. You can create star trails specifically, but that’s not what we are going for here since we started with Milky Way photography. We want crisp, non-star trail images when doing this.
Here is the formula to avoid star trails—the 500 rule – Divide 500 by the focal length of your lens. So, if you have a 24mm lens on a full-frame camera, you will set your shutter speed to 20 sec. (500/24 = 20.83). If you are using a crop sensor camera, first do the math of the crop sensor to find the focal length. Cannon is 1.6, Nikon is 1.5. Convert to full-frame focal length, then use the formula. Nikon 18mm x 1.5= 27mm – 500/27 = 18.51 seconds.
In live view mode, you can change your white balance settings and see what they look like. You can also shoot in shade or cloud mode as a standard setting and adjust things later when editing.
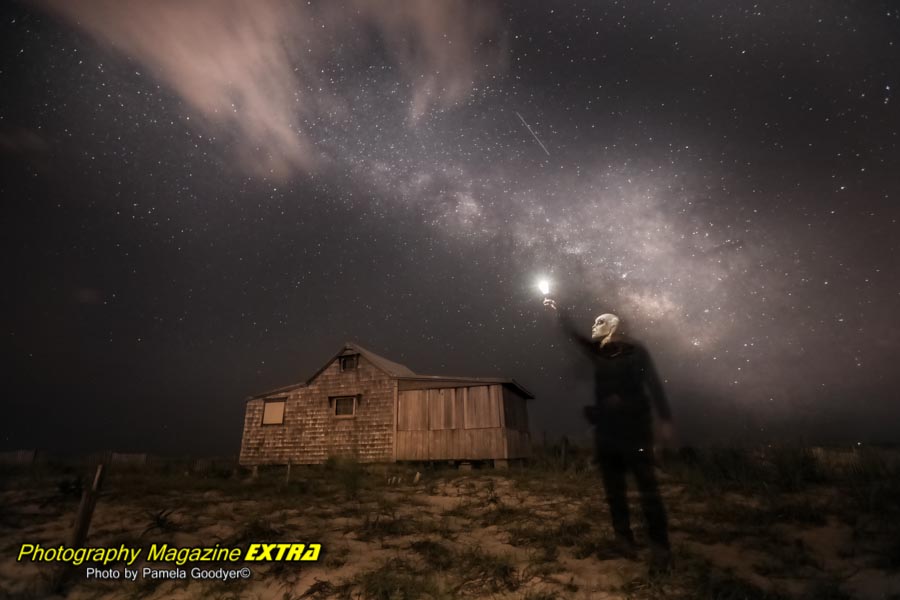
To focus in the dark, use your camera’s live view, hit the zoom button, and focus on a bright star. You can also use the infinity setting on your lens, but do several test shots to determine accuracy. It can be off a little on some lenses. You can also light it up with a flashlight, focus, then gently, without touching the focus ring, put the camera in manual focus so it will not search for the focus. You must do this each time you move your camera to take your next angel.
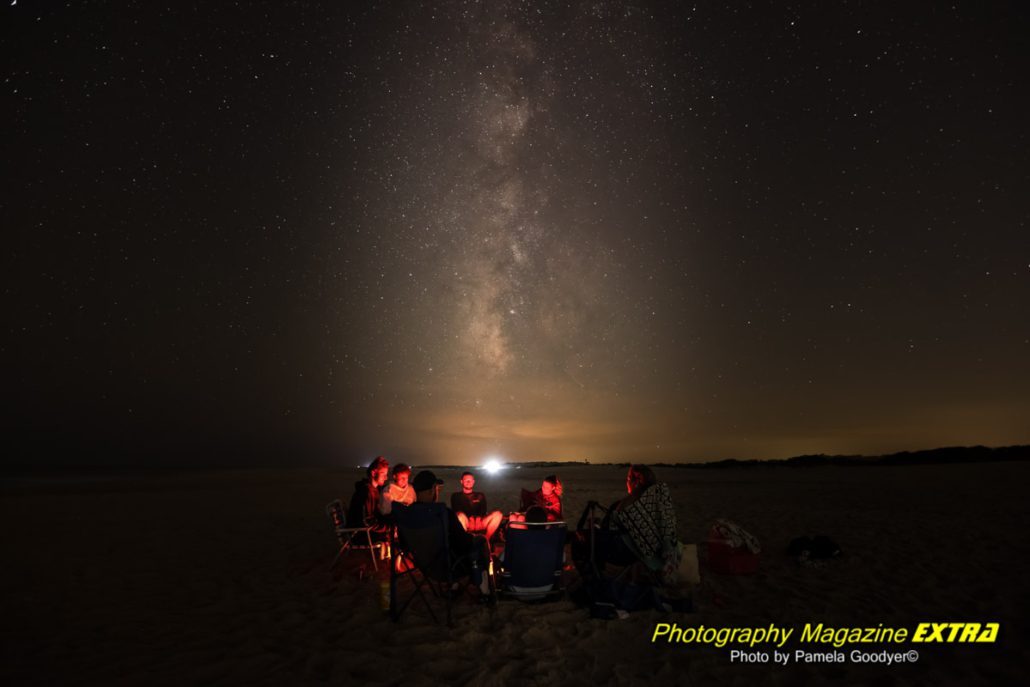
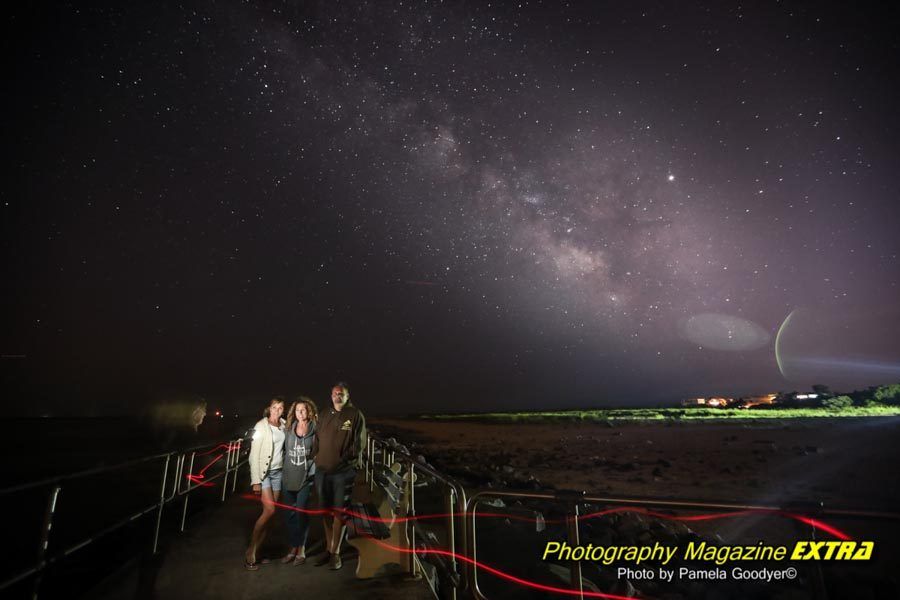
The best images are usually of the dense part of the Milky Way. We can see this part of the milk way in the southern sky. During March, April, and May, the Milky Way rises above the horizon in the pre-dawn hours. In June, at about 10:00 p.m., you will see the Milky Way. From July until October, you can see the Milky Way as soon as it sunsets, and it becomes dark enough to see about an hour after sunset. In November, the Milky Way no longer comes above the horizon. You will have to wait until March if you want to stay away really late or get up early to see her again.
See our Milky Way Hot Spot Locator and our Night Photography Information.
Enter Here to find the Darkest Skies in the Lower Forty-Eight.
This year, our focus for photography locations will be the Milky Way Galaxy. We are thrilled to explore as many Dark Sky locations as possible to capture the magnificence of this cosmic wonder. Our team at the Magazine headquarters in New Jersey is eagerly embracing this new passion. While we do have a few prime Milky Way spots nearby, such as in New Jersey and parts of New York and Pennsylvania, we are willing to travel further for the darkest skies. Some potential local destinations include the Catskill Mountains, the Adirondacks, and Cherry Springs State Park. However, flying to other locations may become necessary, and we can only hope for clear weather conditions when booking flights a week ahead. Planning your trip around the current weather forecast is key when driving to your chosen location.
The Milky Way is a vast expanse of glittering stars spanning the universe’s length. Photographing this cosmic masterpiece was an endeavor – a breathless journey into the heart of the unknown, full of risks and rewards beyond imagination. With bated breath, we gazed through the lens at the galaxy that stretched before us, our hearts quickening with anticipation. Every shot taken was a triumph over the darkness; each moment spent beneath its twinkling lights was an unforgettable memory that would stay with us forever.
As experts in astrophotography, we know that capturing the beauty of the Milky Way requires more than technical knowledge and skillful manipulation of camera settings. It is an art form all on its own – one that demands patience, dedication, and a deep appreciation for the wonders of our universe. The challenge lies not only in the technical aspects of photography, such as shutter speed and aperture settings, but also in finding a location with minimal light pollution. This is essential to showcase the true magnificence of our galaxy.
With each passing moment, we were transported further into the depths of this cosmic masterpiece – an ethereal landscape punctuated by sparkling stars and nebulae that glimmered like jewels against a velvet sky. We lost ourselves in its vastness, marveling at every burst of color as if it were painted just for us. But even as we reveled in the glory before us, we knew there was still more beauty to uncover within this sprawling Universe.
As I continued photographing the Milky Way, I couldn’t help but feel a sense of awe at its sheer scale. It was as if I was looking at an endless sea of stars, each twinkling like a diamond in the sky. The beauty was indescribable, and I knew no photograph could fully reflect its true essence.
As we moved deeper into the galaxy, our eyes were drawn to a particular star cluster that shimmered in shades of blue and purple. It was like nothing we had ever seen – a celestial oasis amidst the vastness of space. Eagerly, I adjusted my camera settings and began taking pictures. I captured more and more images until, suddenly, something caught my eye. There! In the corner of one photo lay a curious streaking light that seemed out of place amongst all the other stars around it. Could it be..?
Excitement surged through me as I realized what I might have just captured on film: an alien flashing itself in our image! This discovery would change everything for humankind—proof that life is beyond our world! But we needed to study this image further to confirm its authenticity before sharing it with anyone else. As we continued photographing, we wished moments beneath these twinkling lights for us would last forevermore. See our ALIEN PHOTOGRAPHY PAGE.
 Photography, Lessons, Workshops and Classes.


")


