Quickly and Easily Learn Waterfall Photography
HOW TO PHOTOGRAPH WATERFALLS
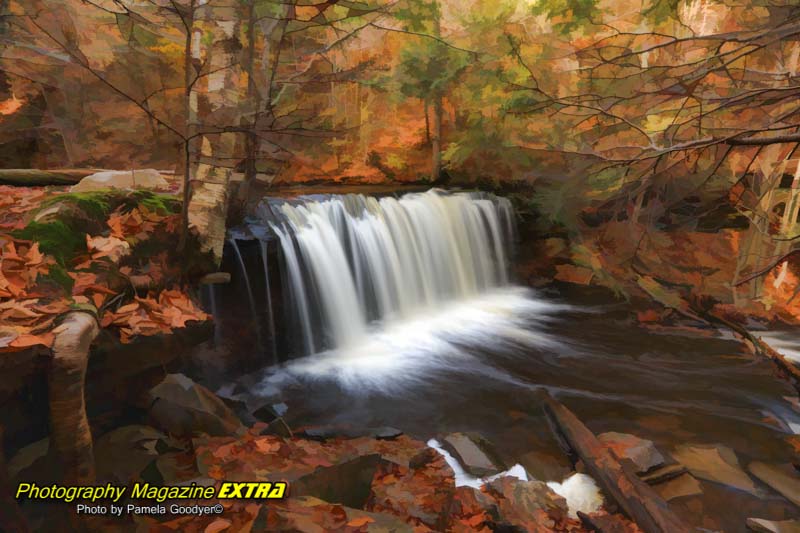
Use these instructions for waterfall photography and any moving water photography. This is how you will get the milky water effect, as we call it. These are basic instructions. Even beginners can get incredible milky water images since the process is the same (with a few variations) each time we take long-exposure milky water waterfall photography. The most important thing here is an excellent Neutral Density Filter that allows you to slow down your shutter speed and using a tripod.

We don’t go anywhere without our Think Tank Camera Bags. Special offer!
SETTING UP YOUR WATERFALL PHOTOGRAPHY SHOT
STEP 1: PUT YOUR CAMERA ON A TRIPOD
You must use a tripod to get the silky water effects in your photograph. This is called long-exposure photography. Whenever you keep your shutter open for more than about 1/50th of a second, you always need to be on a tripod, or you will get one big blur.
STEP 2: PUT A NEUTRAL DENSITY FILTER ON
Even on a cloudy day, you will want to use a Neutral Density Filter. It’s like sunglasses for your camera. You can do more prolonged exposure, making the water movement silky. The darker the ND Filter, the longer you can expose it. A ten-stop ND is the darkest one. We like the Promaster ND ten stop. (More below)
STEP 3: SET YOUR CAMERA TO MANUAL MODE
You will want to control both the shutter speed and the aperture. Manual mode allows you to do this. Most cameras use the letter M for manual mode.
STEP 4: SET THE APERTURE
Set the aperture to the smallest one (most will be f/22, some f/29). This will allow the least light to enter the camera, allowing you to do the longest exposure possible.
STEP 5: SET THE ISO
Set your ISO to 100 or the lowest your camera will allow. Some cameras go as low as 50. Like the aperture, we are trying to block the light from coming into the camera so we can do a long exposure of At least two seconds or more.
STEP 6: SET THE SHUTTER SPEED
Now, looking through the camera, roll the shutter speed using the main dial so the exposure level indicator goes to ‘0’ on the exposure scale at the bottom of the screen. Without a filter, you may not get lower than 1/15th sec. or even that low on a sunny day. This is why a neutral density filter is so important.
Step 7: SET YOUR 2-SECOND TIMER
Instead of using a shutter release, you can utilize a timer to take the photo. This ensures that when you press down on the button to take the image, you won’t cause any camera shake or blur.
That’s it. Once you do it several times, it’ll be effortless.
Evaluate the image. If your image has hot spots (areas of overexposed white spots), adjust your shutter speed and test again until it is just right. Remember, the darker the filter, the longer the exposure, and the milky flow looks better.
Review your images on your camera’s screen and zoom in to look for overexposed areas. You can always lighten them in the post, but you cannot fix blown-out, overexposed highlights. If you have overexposed images, use your exposure compensation to go down until they are no longer blown out.
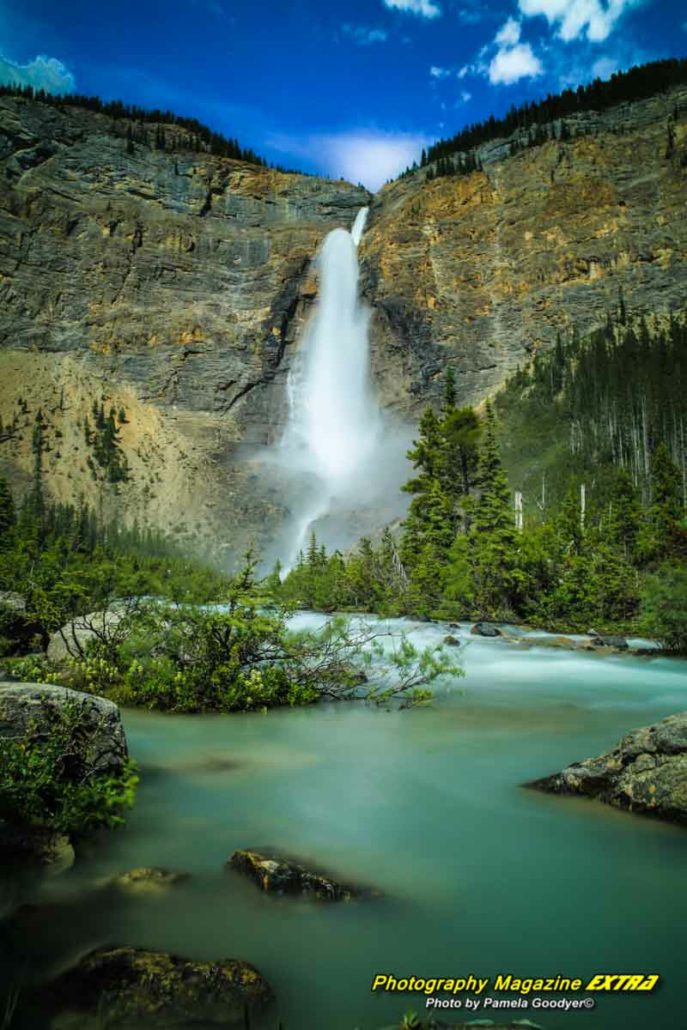
SOME OF OUR FAVORITE WATERFALL & MILKY WATER LOCATIONS
You can read about the details of each location.
WATERFALL AND MILKY WATERS PHOTOGRAPHY
WHERE TO LEARN WATERFALL PHOTOGRAPHY
WATERFALL PHOTOGRAPHY – WHEN TO GO
Forget about blue skies and sunshine – overcast days are a photographer’s dream for capturing the beauty of waterfalls. The diffused lighting creates an even glow across the entire scene, making it easier to balance exposure and avoid blown-out highlights. Plus, who wants to risk being sunburnt while trying to capture that perfect shot? In this case, clouds are your friend. But you can buy organic sunscreen here.
On rare occasions when the sun peeks through and creates stunning effects like rainbows or backlighting, embrace it! But for consistent results, stick with those moody gray skies. Your photos will thank you later.
CARRY MULTIPLE FILTERS
NEUTRAL DENSITY FILTERS – Listen up, fellow photographers! This is important information. If you want to create that perfect waterfall shot, you better have a neutral-density filter on hand. And don’t think you can get away without it on a gloomy day in the woods. Without a neutral density filter, You will not achieve over 1/15th of a second exposure. You’ll need at least a second or two-second of exposure for the Milky Water effects.
If you’re feeling fancy and heading to the beach for milky ocean shots, you might need a whopping 4 to 5 seconds with a 10-stop filter, depending on how fast the water moves. The water doesn’t move as much near the bay areas, so it’s almost always at least three seconds to get blurry. Our new Promaster one is the real deal – trust me, your Instagram followers will thank you for those dreamy water pics! Make sure you do long exposure milky water effects on all your moving waters. It really makes for dynamic photography.
CIRCULAR POLARIZING FILTERS – These filters remove the harsh glare from the water, providing a more accurate depiction of its colors. However, they do not reduce enough light to capture long exposure shots that create a milky effect in the water; unless the water is moving at a rapid pace and it is an overcast day, you may have a shot with it.
We wear a belt with a filter pack that allows us to carry six filters. The pack is on our hips at all times, so we can easily try it. If it doesn’t give us a long enough exposure, we just put the neutral density filter back on. Having a variety of filters is always ideal.
CONNECT TO MOTHER GAIA AND EXPERIENCE NATURE
For those new to waterfall photography, Pamela Goodyer advises that the key is to immerse yourself in the experience fully, connect with nature, and ground yourself to Mother Earth. If you are feeling overwhelmed or distracted, take a few moments to meditate. Photography can be meditative, allowing you to tap into your creativity and create stunning images. Your art will flourish when you are in a state of mindfulness and connectedness with the environment.
PHOTOS TOP OF PAGE
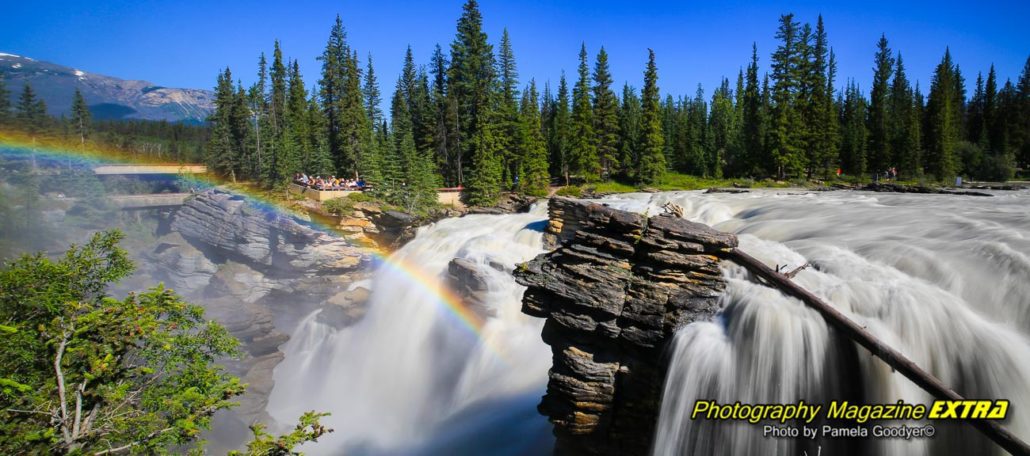
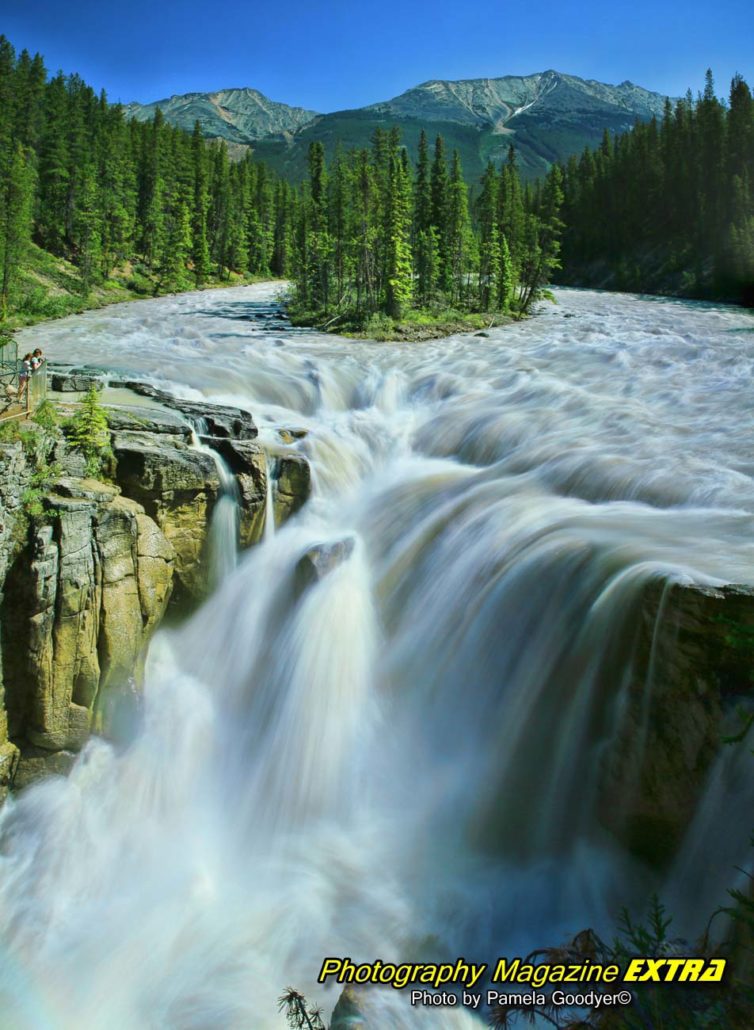
Athabasca Falls & Sunwapta Falls
Located in the stunning Canadian Rockies, off the famous Icefields Parkway, are two breathtaking waterfalls—Athabasca Falls and Sunwapta Falls. The powerful rush of cascading water spills over ancient, jagged rocks and glistens under the warm sun. The air is crisp and invigorating, carrying with it the faint scent of pine and fresh glacial melt. It is a true natural wonder, a sight not to be missed on any journey through this picturesque landscape.


Photography Lessons
 Photography, Lessons, Workshops and Classes.
Ghost Hunting

Photography Contests