Rocky Mountain Elk

Rocky Mountain National Park Photography
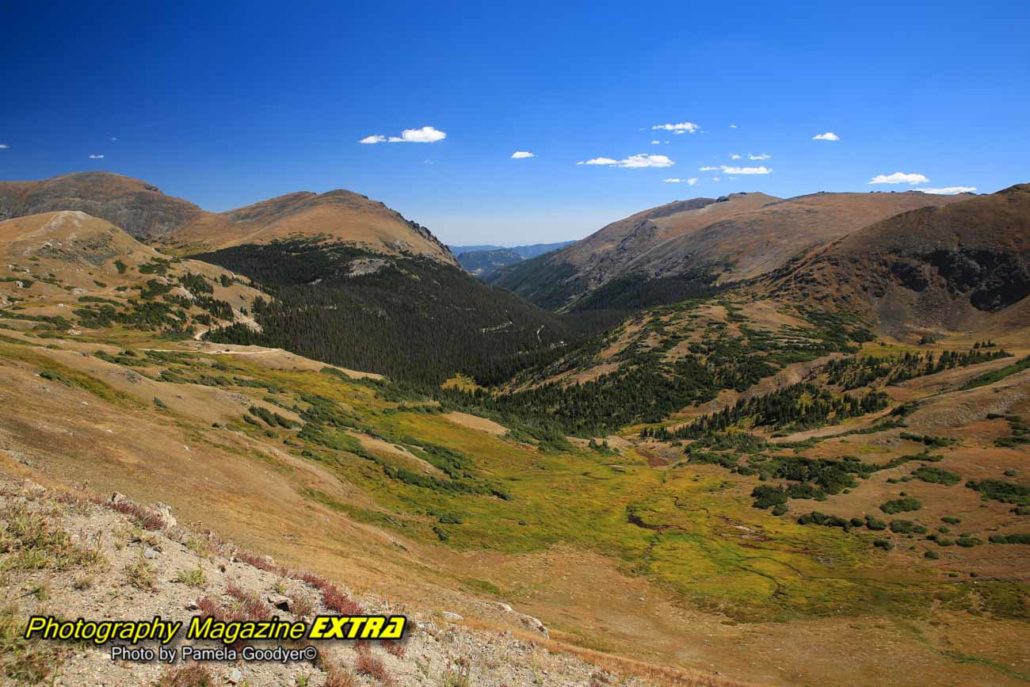
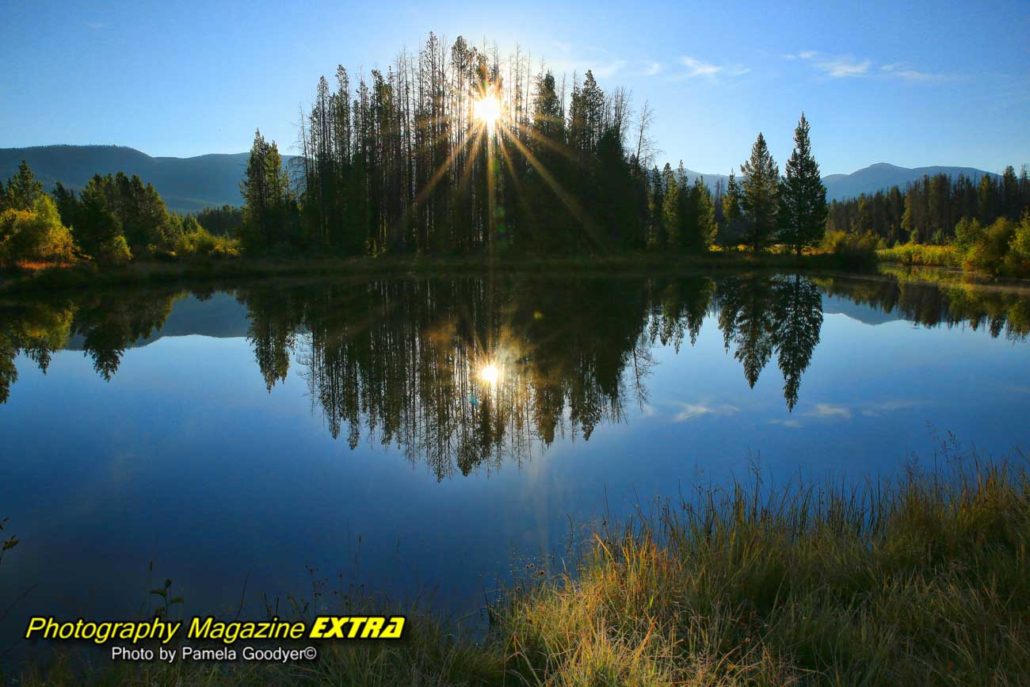
The Quieter Side of Rocky Mountain National Park

You will most likely find moose near the Grand Lake area entrance. Of course, early morning and at their dinner time is the best time to go looking. Take a look at the image to the right. Unfortunately, we did not get a good moose picture. It was taken before we ate breakfast on the Grand Lake side of the town in the Kuawuneeche Valley, where many moose call home.

We ate at Sagebrush BBQ and Grill for dinner and liked it so much that we returned for breakfast.  Go early for any breakfast. There are lines everywhere at your quick take-out places.  Better yet, bring a thermos in your suitcase, pack your meal to go and get out there early.  Then, you don’t have to worry that the lines will hold you up. Lines were holding us up, and it was late September.

Some viewing areas are closed at night so as not to interfere with the rut. This sign says September 1 through October 31.

Elk viewing areas East side of Rocky Mountain National Park:

  • Moraine Park
  • Horseshoe Park
  • Upper Beaver Meadows

Elk viewing areas – West side of Rocky Mountain National Park:

  • Harbison Meadow
  • Holzwarth Meadow
  • Throughout the Kawuneeche Valley

How to Photograph Rocky Mountain, National Park

Rocky Mountain National Park is one of the most popular tourist destinations in the United States, and for a good reason – its views are breathtaking. Photograph Rocky Mountain National Park so you can come home with beautiful memories – and amazing photos to match.

Popular Areas to Photograph

There are many areas to photograph in Rocky Mountain National Park. Some of the most popular spots include:

Bear Lake Area

This is a great place to photograph the park’s wildlife, including bears, elk, and deer. You can also get some great views of the mountains from here.

The Moraine Park Area

This is a great place to photograph the park’s landscapes, including its alpine lakes, forests, and meadows. You can also get some great views of the Rockies from here.

Adams Falls, Rocky Mountain National Park

Adams Falls is one of the most popular photography areas within Rocky Mountain National Park. The falls are located on the Big Thompson River and are easily accessible from the main road. There are several pull-offs along the road where you can park and walk to the falls. Adams Falls is a great place to photograph both day and night. During the day, the sun illuminates the falls and creates a beautiful rainbow effect. At night, the falls are lit by spotlights, creating a stunning effect.

Milner Pass and Poudre Lake, Rocky Mountain National Park

Two of our favorites are Milner Pass and Poudre Lake. Milner Pass is located on the Continental Divide and offers stunning views of the surrounding mountains. The area has numerous hiking and backpacking trails, so there is plenty to explore.

Poudre Lake is a gorgeous alpine lake perfect for those who love to fish so that you can get photographs of people fishing. The trail around the lake is easy to follow and makes for a great hike.

Gore Range Overlook, Trail Ridge Road, Rocky Mountain National Park

The Gore Range Overlook on Trail Ridge Road is one of the most popular areas for photography within Rocky Mountain National Park. The overlook provides stunning views of the surrounding mountains, valleys, and forests. Many visitors enjoy photographing the scenery from this vantage point.

Far View Curve, Rocky Mountain National Park

Are you looking for a breathtaking view of Rocky Mountain National Park? Then head to Far View Curve! This popular spot is located on Trail Ridge Road and offers stunning panoramic views of the park. Be sure to bring your camera, as you’ll want to capture the beauty of this place forever.

Rainbow Curve, Rocky Mountain National Park

If you’re looking for a breathtaking Rocky Mountain National Park view, look no further than Rainbow Curve. This popular spot is just off the main road and offers stunning views of the mountains and valley below. Visitors can also find several hiking trails nearby, making it the perfect place to explore the park.

Deer Ridge Junction, Rocky Mountain National Park

Deer Ridge Junction is one of the most popular areas in Rocky Mountain National Park. The area is known for its stunning views, abundant wildlife, and easy access to various hiking trails.

One of the most popular trails in the area is the Deer Ridge Trail, which offers hikers beautiful views of the valley below. The trail is also great for seeing various wildlife, including deer, elk, and bighorn sheep.

Another excellent option for hikers is the Emerald Lake Trail. This trail takes hikers to one of the most beautiful lakes in the park, Emerald Lake. Along the way, hikers will also pass by Dream Lake and Nymph Lake.

The Flattop Mountain Trail is an excellent option for a more challenging hike. This trail leads to the summit of Flattop Mountain, which offers stunning 360-degree views of the surrounding area.

No matter what your hiking level, Deer Ridge Junction has a trail that’s perfect for you. So come on and enjoy all this fantastic area has to offer.

How to Get to Rocky Mountain National Park

Rocky Mountain National Park is located in north-central Colorado, about an hour and a half drive from Denver. To get there, take Interstate 70 west from Denver and exit at the town of Estes Park. From there, follow the signs for the park.

Camera Gear

When visiting Rocky Mountain National Park, bring your camera gear! This beautiful park has many types of scenery, so you’ll want to be prepared to capture it all. Here are a few things to keep in mind when packing your gear:

-A sturdy tripod will be vital for getting sharp landscape photos.
-A wide-angle lens will help you fit the majestic mountains into your frame.
-For wildlife photography, bring a telephoto lens and a bean bag or monopod to help stabilize your camera.
-Pack plenty of extra batteries and memory cards, as you’ll likely take many photos.

Rocky Mountain National Park Where to Stay


USE camera information photography

Photography Information

Here is some basic information for your trip. You can find more detailed instructions on some of our other pages.

Photography & Location Info


Rocky Mountain National Park is at its peak visitation in summer and fall. June – September. Trail Ridge Road is open only from Memorial Day to mid-October, but the dates may vary. The crowds are thinner in early June and later September. Fall foliage starts to peak in mid-September. The yellow Aspens make for some astonishing images.

Spring can be a chance to get some new growth, or you could still be hit with a blizzard. June will vary and can be rainy. July – September. On Trail Ridge Road, it can be 15°F–20°F cooler than at the park’s lower elevations. Wildlife viewing and fishing photography are good all year, but fall has the rut when the bull elks get active. The rut plus yellow aspen and fewer humans in mid-October are ideal.


AT A GLANCE

Lens: Wide Angle but you may find a bird or two. Not much wildlife here.

Gear List at a Glance: Circular polarizing filter, neutral density filter, tripod, shutter release, wide-angle lens.

When to Go:  The only time not to go is when they close the road down due to winter conditions. Check with the park before you go. Fall is ideal.

SHUTTER PRIORITY

If you have moving subjects, you will want to shoot in shutter priority to assure your shutter speed is high enough to have your subject in sharp focus. For people walking by, approximately 1/250th of a second is appropriate, and adjust your ISO accordingly. If they are running fast, increase your shutter speed to about 1/500th of a second. A fast bird flying by would be shot at about 1/1000th of a second. If it’s a bright sunny day, go as high as  1/1200th of a second. Remember, the higher your shutter speed; the less light comes into the camera. It should not be an issue outside during daytime hours. For More Details, see our Shutter Priority Page.

MANUAL MODE

You have moving waters here. You can do your long-exposure running and milky water shots. You will have to use a tripod for this effect. Your settings will vary depending on the lighting and your neutral density filter. You will shoot in manual mode for the milky waters. ISO is always 100 or as low as your camera will allow. The aperture is f22. Your shutter speed will be the only variable depending on the light. Roll your shutter speed until your meter reads zero. (In the center)  Use your shutter release or your 2-second timer to prevent camera movement when exposing. You will want at least a 2-second exposure for milky water. If you don’t have a neutral density filter, you may not get more than 1/15th of a second in the sun. 

If you don’t have a neutral density filter, you can buy one here. We highly suggest you do not go anywhere without one. It makes all the difference between lifeless images and outstanding, dynamic images.

APERTURE PRIORITY

Aperture Priority is often used to blur the background of your images and control your depth of field (how much from the subject to the background is in focus). For more information on this – see our Aperture page 

ISO

The higher you set it, the more light comes in when exposing an image. The higher the number, the more digital noise, so if possible, stay below 800. If you need to go higher to get the shot, you can use Topaz Denoise to filter out the digital noise later.

NATIONAL PARK AREA INFORMATION


The best hotels while doing photography

HOTEL INFO

Colorado Cabin Adventures Info

Phone: 970-509-0810
info@coloradocabinadventures.com

12082 US Highway 34
Grand Lake, Colorado 80447

The Inn on Falls River Information

Add Your Hotel here!

Do you want us to send our photography and ghost hunting friends to your hotel for their photography or ghost hunting trip? Put your hotel information here. We will put pictures of your hotel, the website link, the phone number and your information on your hotel.

Would you like to be a featured hotel like this article or this one?  Please send us an email.  You will be surprised at how affordable our prices can be.

area information - photography

AREA INFO

Entrance Fees: 

“Day Use Pass” will be $20, while the weekly pass will increase to $30; Annual Passes are $50.  Rocky Mountain National Park is open 24 hours a day, 365 days a year, weather permitting.

GOOD CAMPING

CAMPING

 CAMPING

Manor Park of Estes – Estes Park

Spend the night or the whole summer with them. They offer nightly, weekly, monthly and seasonal rentals.  Centrally located between Rocky Mountain National Park and Estes Park, you’ll see wildlife and enjoy fishing on the Big Thompson River (with license).

Click here to go to Rates and Reservations.

15 – October 15.  970-586-3251.

Great location! 5 minutes to Rocky Mountain Natl Park
Jellystone Park of Estes
5495 US-36, Estes Park, CO 80517

Surrounded by Roosevelt National Forest, Jellystone Park of Estes is the perfect Campground and RV Park for your family to explore nature at its best!  Relax in nature, or join their planned activities for “kids” of all ages.  A variety of sites are set among towering Ponderosa pines where wildlife abounds. Weekend Pancake Breakfasts.  Pet-friendly campsites!

Seven Pines Campground

Hermit Park Open Space
FOOD & DINING

FOOD & DINING

Add Your Restaurant Here

Do you want us to send our photography and ghost-hunting friends to your Restaurant after their ghost-hunting or photography trip? Put your restaurant information here. We will put a picture of your establishment, the website link, the phone number and your information on your Restaurant to make it easy for our photographers and ghost hunters to find you.

WEATHER

 WEATHER?

 Don’t forget that you can use a rain sleeve on your camera if it is raining. If it is bright and sunny, you want to use a low ISO such as 50 or 100.

If you photograph cloudy days, you can do running water or waterfall photography to help avoid the glaring sun. You can also use an ND filter to get long exposure for dramatic effects, even in the sunshine. If you ghost hunt indoors in abandoned places, be careful!

GEAR LIST FOR SHOOTING MILKY WAY


LIGHT POLLUTION MAP:

Light pollution map

CAMERA:

You will need a camera to manually control your ISO, shutter speed, and aperture.

LENS:

A fast, wide-angle lens of 1.4 – 2.8 is ideal. If you use a 3.5 or higher (slower lens), you must increase the ISO. The higher the ISO, the more grain or digital noise or grain will appear in your photos.

TRIOPD:

A good, sturdy tripod is essential for night photography. If it gets windy, you will need a sturdy one. Remember that when you buy one, it should be sturdy enough to withstand the wind but small enough to fit in your suitcase.

SKY MAP:

Sky Guide is available through the iTunes Store for $1.99. It has a 5 out of 5-star rating on both the current (3.2) version (1200+ ratings) and all previous versions (8600+ ratings).

FLASHLIGHT:

Our choice is Coast brand for flashlights. The ideal flashlight will have high lumens, and you can zoom in and out on the light emitting from the flashlight. Get the HP7, PX45, or the G50. Ideally, go with the  HP7.

MOON PHAZE MAP:

The best time to go is during a new moon; you want to be in the darkest area possible. The week before the new moon, when the moon has not risen, is a perfect time to go, so be sure to check the moonrise chart to see when the moon will be up.

REMOTE SHUTTER RELEASE:

When painting with light and over a 30-second exposure, you must have a shutter release to use your bulb mode. When exposing your pictures in general, you can use the remote release or use your camera’s built-in two-second timer.

CAMERA SETTINGS FOR MILKY WAY


ISO:

Start with ISO 1600 – 3200.  This is just a common starting point, and you will adjust from here.

Shutter Speed – Remember, the earth is rotating. If you leave the shutter open for too long, you will see star trails that will not make for a crisp image. We want crisp, non-star trail images. Here is the formula to avoid star trails—the 500 rule – Divide 500 by the focal length of your lens. So, if you have a 24mm lens on a full-frame camera, you will set your shutter speed to 20 sec. (500/24 = 20.83). If you are using a crop sensor camera, first do the math of the crop sensor to find the focal length. Cannon is 1.6, Nikon is 1.5. Convert to full-frame focal length, then use the formula. Nikon 18mm x 1.5= 27mm – 500/27 = 18.51 seconds.

APERTURE:

Depth of field isn’t critical on these shots, but letting the light into the camera is; therefore, you should shoot wide open if. If the depth of field is essential to you, try not to go too high. (wide open =the lowest aperture your camera will allow). You will have to increase the ISO some, giving you digital noise.

SHUTTER SPEED:

Now that the ISO and aperture are set in manual mode, roll your shutter speed until your meter reads (0) zero. Take a test shot and adjust from there. Remember, the earth is rotating. If you leave the shutter open for too long, you will see star trails that will not make for a crisp image. You can make star trails specifically, but that’s not what we are going for here since we started with Milky Way photography. We want crisp, non-star trail images when doing this.

Here is the formula to avoid star trails—the 500 rule – Divide 500 by the focal length of your lens. So, if you have a 24mm lens on a full-frame camera, you will set your shutter speed to 20 sec. (500/24 = 20.83). If you are using a crop sensor camera, first do the math of the crop sensor to find the focal length. Cannon is 1.6, Nikon is 1.5. Convert to full-frame focal length, then use the formula. Nikon 18mm x 1.5= 27mm – 500/27 = 18.51 seconds.

WHITE BALANCE:

In live view mode, you can change your white balance settings and see what it will look like. You can shoot in shade or cloud mode as a standard setting and adjust things later when editing.

LIVE VIEW:

To focus in the dark, use your camera’s live view, hit the zoom button, and focus on a bright star. You can also use the infinity setting on your lens but do several test shots to determine accuracy. It can be off a little on some lenses. You can also light it up with a flashlight, focus, then gently, without touching the focus ring, put the camera in manual focus so it will not search for the focus. You must do this each time you move your camera to take your next angel.

WHEN TO VIEW THE MILKY WAY:

The best images are usually of the dense part of the Milky Way. We can see this part of the milk way in the southern sky. During March, April, and May, the Milky Way rises above the horizon in the pre-dawn hours. In June, at about 10:00 p.m., you will see the Milky Way.  From July until October, you can see the Milky Way as soon as it sunsets, and it becomes dark enough to see about an hour after sunset. In November, the Milky Way no longer comes above the horizon. You will have to wait until March if you want to stay away really late or get up early to see her again.

See our Milky Way Hot Spot Locator and our Night Photography Information. 

error: Content is protected !!