

EAST POINT LIGHTHOUSE
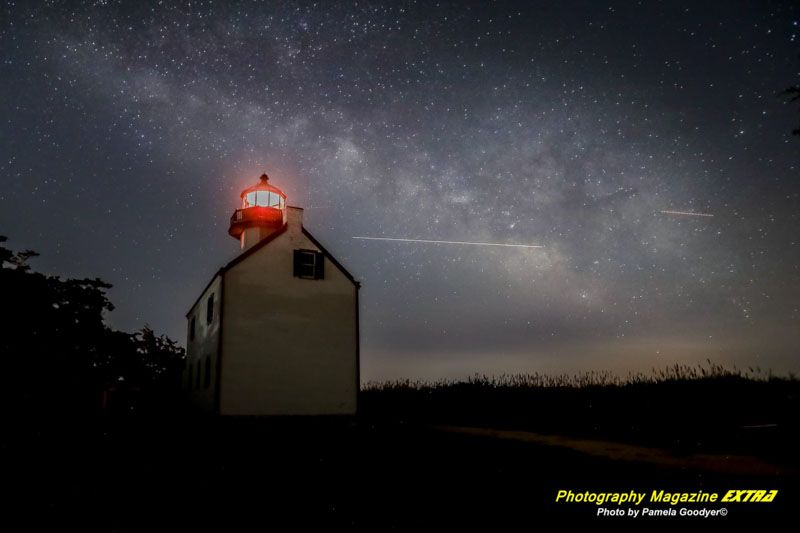
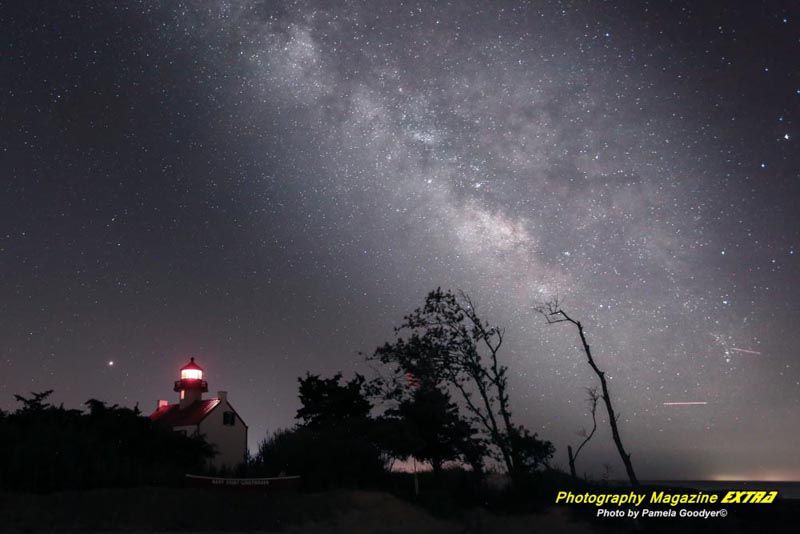
The East Point Lighthouse in New Jersey is one of the best places to photograph the Milky Way in New Jersey. There are limited locations in New Jersey for Milky Way photography. This article will give you tips on getting the best night sky photos. You can make star trails if it is not the Milky Way season.
PHOTOGRAPHING EAST POINT LIGHTHOUSE
We had the excellent opportunity to photograph East Point Lighthouse in New Jersey. We wanted to share some tips for anyone interested in photographing this beautiful location. First, East Point Lighthouse is very dark, making it ideal for Milky Way photography. There are minimal light pollution sources near the lighthouse so that you can take advantage of the dark skies.
DAYTIME AND SUNSET PHOTOS
If you’re interested in photographing East Point Lighthouse, we recommend getting there early and doing sunset photography. You must bring a tripod, a wide-angle lens, and a headlamp or flashlight to help you see in the dark.

WHEN TO GO TO THE EASTPOINT LIGHTHOUSE
Any time of year is suitable for general photography, but for photographing the Milky Way at East Point Lighthouse, you must go at a specific time to ensure the Milky Way is Visible. Midweek is the best. People come here to watch the sunset, and most leave, but if you want the best chance of having the place to yourself at night, go in the middle of the week.
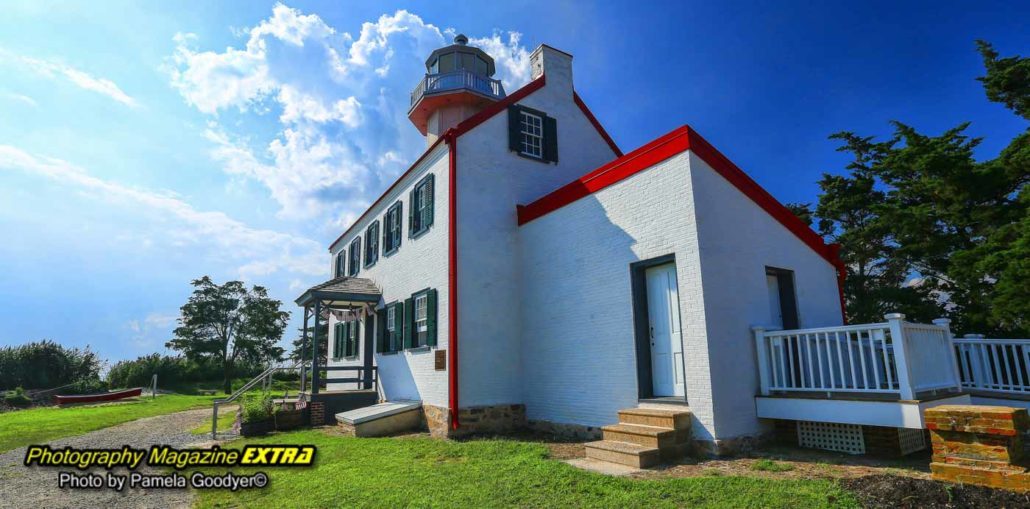
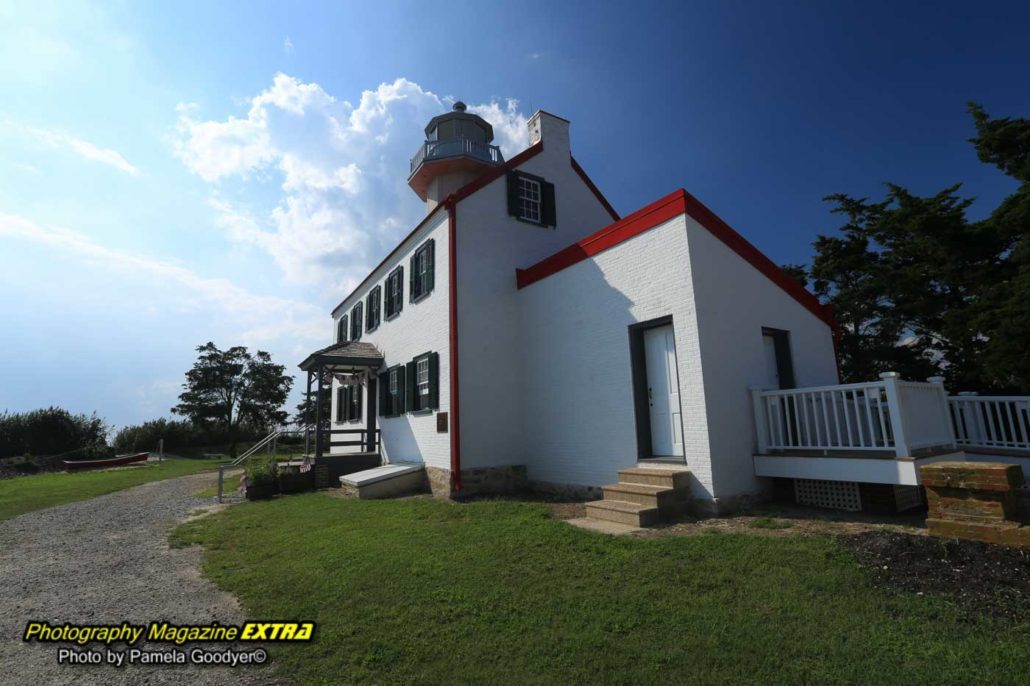
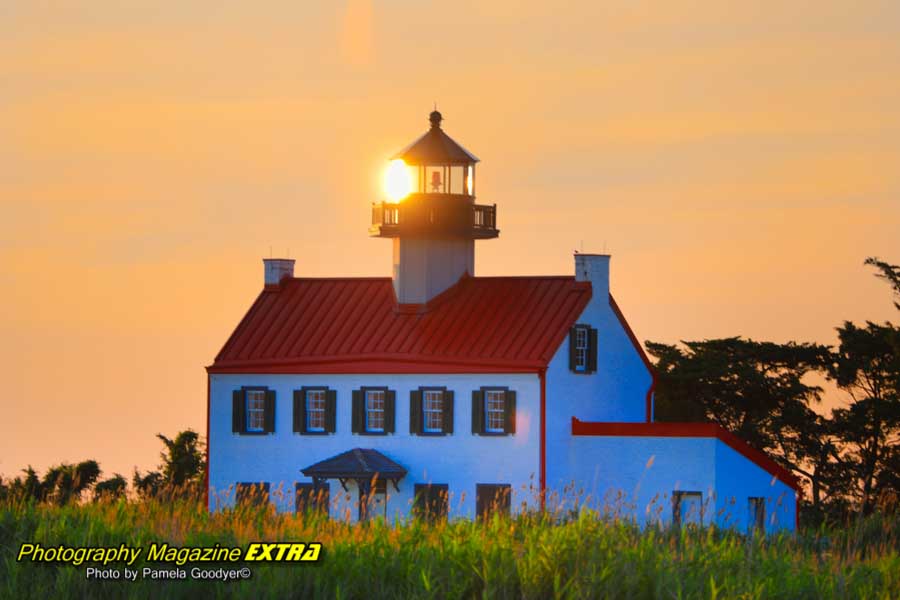
A complete renovation was done to the lighthouse recently. The bright red makes the building look dynamic.
PHOTOGRAPHY BASICS FOR THE LIGHTHOUSE
Brush up on the basics for daytime photography, too, before you follow our instructions for how to shoot the Milky Way.
Shutter Speed – Find out more about how to shoot in shutter priority. This is used mainly for moving subjects to avoid motion blur.
Aperture – Shooting in aperture priority allows you to focus on your depth of field. It is mainly used for still subjects.
ISO – This controls how much light is let into your camera when exposing your picture.
White Balance – Color temperature. Cloud, shade, sun, and also custom settings.
SEE BELOW FOR MORE HOW-TO PHOTOGRAPHY DETAILS
MILKY WAY PHOTOGRAPHY EAST POINT LIGHTHOUSE
If you are looking for a breathtaking Milky Way photography spot in NJ, look no further than East Point Lighthouse. This location offers stunning night sky views, and with a bit of planning, you can capture some truly incredible images. Here are some tips to help you make the most of your East Point Lighthouse Milky Way photography experience.
1. Plan your shoot around the moon cycle – The moon’s brightness can wash out the Milky Way in your photos, so it’s best to plan your shoot for when the moon is either not visible or is in its new moon phase. Here you can find more details.
2. Arrive early to scout out the best shooting locations – It’s a good idea to arrive at East Point Lighthouse well before sunset to have time to find the perfect spot for your photos.
3. Use a tripod – Night photography requires long exposures, so a tripod is essential for keeping your camera still and ensuring sharp images.
4. Set your camera to manual mode – This will give you complete control over your camera’s settings and allow you to experiment to find the perfect exposure for the conditions.
LOCATION – HOW TO GET TO THE LIGHTHOUSE
East Point Lighthouse is located in Heislerville, Cumberland County, New Jersey. It’s west of Cape May and Avalon, other Milky Way photography hot spots. From the north, take Route 55 south to Exit 28A. From the south, take Route 47 north to Exit 16B. Once you’re on Route 49, follow the signs for East Point Lighthouse. The drive takes about an hour and a half from Philadelphia.
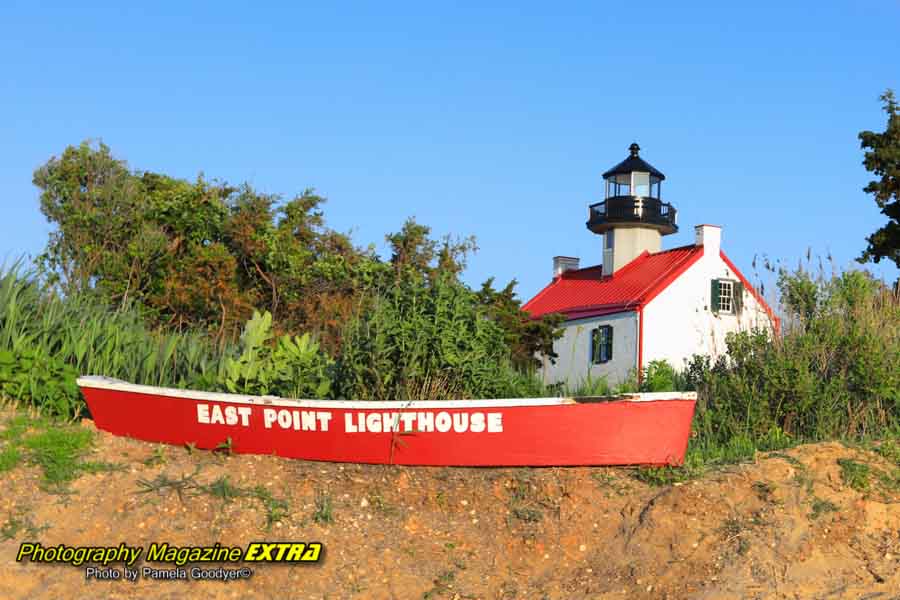
ABOUT THE LIGHTHOUSE
The East Point Lighthouse is a dazzling display of history and maritime beauty, located on the Southern Bayshore in Cumberland County, New Jersey. Built in 1849, it remains an active navigational aid, serviced by the United States Coast Guard and managed by the non-profit Maurice River Historical Society. This society has fully restored and furnished the lighthouse with its beacon, which serves as a year-round museum and a spectacular light at night. The two-story Cape Cod-style building is the second oldest lighthouse in New Jersey and one of only a few land-based beacons on the Delaware Bay. It’s also registered on the National Historic Registry.
East Point is known for its views, sunsets, and history—allowing tourists, artists, photographers, and nature lovers to appreciate its natural beauty. A picnic area and ADA ramp can be found on the premises. To learn more about this stunning site, visit their website.
EAST POINT LIGHTHOUSE EROSION – THEY NEED YOUR HELP
Help Save East Point Lighthouse – Help save the NJ State/NJDEP-owned East Point Lighthouse from the threat of destruction! Contact the Governor of New Jersey and the Commissioner of the NJ DEP and let them know you care about history and want to see preservation before it’s too late. #saveeastpointlighthouse
")


GEAR LIST FOR SHOOTING MILKY WAY
LIGHT POLLUTION MAP:
CAMERA:
You will need a camera to manually control your ISO, shutter speed, and aperture.
LENS:
A fast, wide-angle lens of 1.4 – 2.8 is ideal. If you use a 3.5 or higher (slower lens), you must increase the ISO. The higher the ISO, the more grain or digital noise or grain will appear in your photos.
TRIOPD:
A good, sturdy tripod is essential for night photography. If it gets windy, you will need a sturdy one. Remember that when you buy one, it should be sturdy enough to withstand the wind but small enough to fit in your suitcase.
SKY MAP:
Sky Guide is available through the iTunes Store for $1.99. It has a 5 out of 5-star rating on both the current (3.2) version (1200+ ratings) and all previous versions (8600+ ratings).
FLASHLIGHT:
Our choice is Coast brand for flashlights. The ideal flashlight will have high lumens, and you can zoom in and out on the light emitting from the flashlight. Get the HP7, PX45, or the G50. Ideally, go with the HP7.
MOON PHAZE MAP:
The best time to go is during a new moon; you want to be in the darkest area possible. The week before the new moon, when the moon has not risen, is a perfect time to go, so be sure to check the moonrise chart to see when the moon will be up.
REMOTE SHUTTER RELEASE:
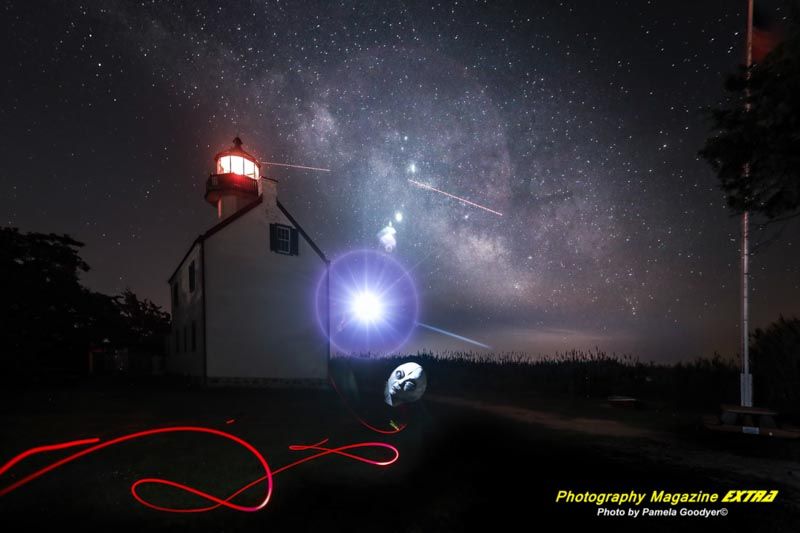
When painting with light and over a 30-second exposure, you must have a shutter release to use your bulb mode. When exposing your pictures in general, you can use the remote release or use your camera’s built-in two-second timer.
CAMERA SETTINGS FOR MILKY WAY
ISO:
Start with ISO 1600 – 3200. This is just a common starting point, and you will adjust from here.
Shutter Speed – Remember, the earth is rotating. If you leave the shutter open for too long, you will see star trails that will not make for a crisp image. We want crisp, non-star trail images. Here is the formula to avoid star trails—the 500 rule – Divide 500 by the focal length of your lens. So, if you have a 24mm lens on a full-frame camera, you will set your shutter speed to 20 sec. (500/24 = 20.83). If you are using a crop sensor camera, first do the math of the crop sensor to find the focal length. Cannon is 1.6, Nikon is 1.5. Convert to full-frame focal length, then use the formula. Nikon 18mm x 1.5= 27mm – 500/27 = 18.51 seconds.
APERTURE:
Depth of field isn’t critical on these shots, but letting the light into the camera is; therefore, you should shoot wide open if. If the depth of field is essential to you, try not to go too high. (wide open =the lowest aperture your camera will allow). You will have to increase the ISO some, giving you digital noise.
SHUTTER SPEED:
Now that the ISO and aperture are set in manual mode, roll your shutter speed until your meter reads (0) zero. Take a test shot and adjust from there. Remember, the earth is rotating. If you leave the shutter open for too long, you will see star trails that will not make for a crisp image. You can make star trails specifically, but that’s not what we are going for here since we started with Milky Way photography. We want crisp, non-star trail images when doing this.
Here is the formula to avoid star trails—the 500 rule – Divide 500 by the focal length of your lens. So, if you have a 24mm lens on a full-frame camera, you will set your shutter speed to 20 sec. (500/24 = 20.83). If you are using a crop sensor camera, first do the math of the crop sensor to find the focal length. Cannon is 1.6, Nikon is 1.5. Convert to full-frame focal length, then use the formula. Nikon 18mm x 1.5= 27mm – 500/27 = 18.51 seconds.
WHITE BALANCE:
In live view mode, you can change your white balance settings and see what it will look like. You can shoot in shade or cloud mode as a standard setting and adjust things later when editing.
LIVE VIEW:
To focus in the dark, use your camera’s live view, hit the zoom button, and focus on a bright star. You can also use the infinity setting on your lens but do several test shots to determine accuracy. It can be off a little on some lenses. You can also light it up with a flashlight, focus, then gently, without touching the focus ring, put the camera in manual focus so it will not search for the focus. You must do this each time you move your camera to take your next angel.
WHEN TO VIEW THE MILKY WAY:
The best images are usually of the dense part of the Milky Way. We can see this part of the milk way in the southern sky. During March, April, and May, the Milky Way rises above the horizon in the pre-dawn hours. In June, at about 10:00 p.m., you will see the Milky Way. From July until October, you can see the Milky Way as soon as it sunsets, and it becomes dark enough to see about an hour after sunset. In November, the Milky Way no longer comes above the horizon. You will have to wait until March if you want to stay away really late or get up early to see her again.
See our Milky Way Hot Spot Locator and our Night Photography Information.

Check for Special Discounts on Instructions
Learn Photography from An International-Award-Winning Photographer
Photography Lessons, Tours & Workshops
Skype and Zoom Lessons
East Point Lighthouse Area Information

AREA INFORMATION:
There are no fees to visit East Point Lighthouse in New Jersey. Limited tours are inside, and the lighthouse is open during the hours below. You can visit at any time on the outside to photograph it. There is no regular staff or offered tour guide to accompany you, so be sure to plan around the hours. The closest hotel is about 20 minutes away. There is a port-a-potty here. This lighthouse is very charming. It has bright white walls and a red roof that makes it stand out from the other lighthouses.
For those wishing to visit, the grounds and beach are open to everyone free of charge all year round. However, to tour the Lighthouse Museum and gift shop, please check the schedule for available dates and times.
Fees to tour & climb East Point Lighthouse Museum are:
- $8 for adults
- $4 for students 11 – 18 years old
- Free for children 10 & under
Hours:
January – April
In January, February, March & April the lighthouse & gift shop are open every 1st & 3rd weekends, both Saturday & Sunday – 11:00-4:00.
May – December – Starting in May and running through December, the lighthouse & gift shop are open every weekend, both Saturday & Sunday – 11:00-4:00.

HOTEL INFORMATION
Cape Harbor Motor Inn Information
715 Pittsburgh Avenue • Cape May • New Jersey • 08204 • Reservations (609) 884-0018
Complimentary trolley service into the Center of Cape May and its beaches – Motel rooms and suites are available – All rooms are non-smoking – Cable TV – Daily maid service – Swimming pool Spacious sundeck – Barbecue area – Shuffleboard – Ice cubes for your convenience – Parking for one car per motel room – Outdoor bike rack (bring bike lock) – WiFi
Your hotel could be a top destination for any passionate photographer or ghost-hound! Share your hotel info with us and we will spread the word through our ad page with photos, website links, phone numbers, and all the details about your amazing hotel. Let’s get those cameras rolling and spirits soaring at your hotel! Advertise with us.

CAMPGROUNDS
Do you want us to send our photography and ghost-hunting friends to your campground to stay during their ghost-hunting trip? Put your campground information here. We will put a picture of your establishment, the website link, the phone number, and the information on your campground to make it easy for our photographers and ghost hunters to find you. They are good at getting there in the dark.
Would you like to be featured in an article as a place to stay while doing photography or ghost hunting? If so, please send us an email. You will be surprised at how affordable our prices can be.

ADVERTISE YOUR RESTAURANT
Do you want us to send our photography and ghost-hunting friends to your restaurant after their ghost-hunting trip? Put your restaurant information here. We will put a picture of your establishment, the website link, the phone number, and the information on your restaurant to make it easy for our photographers and ghost hunters to find you.

WEATHER AT EAST POINT LIGHTHOUSE
Don’t forget that you can use a rain sleeve on your camera if it is raining. If it is bright and sunny, you want to use a low ISO, such as 100.
If you are doing photography along with your ghost hunting on cloudy days, you can do running water or waterfall photography to avoid the glaring sun. You can also use an ND filter to get a long exposure for dramatic effects, even in the sunshine. If you ghost hunt indoors in abandoned places, be careful!
Go to our Photography Store after reading all about waterfall photography or neutral density filters.
Photography Lessons
 Photography, Lessons, Workshops and Classes.
Ghost Hunting

Photography Contests

